Calls
Calls
 Phone numbers
 eSIM for traveling
 SMS
SMS
 Business Phone System
 Speech analytics
 Call Tracking
 Callback button
 Video conferencing
 Click to call button
 VoIP for Business
 Become a partner
 Integrations
 For whom
 Setup guides
 FAQ
FAQ
 Online chat
 Contact support
 Blog
Blog
The Bitrix24 callback widget uses Bitrix24 internal telephony by default. However, there is also an option to make calls using your Zadarma price plan.
The neccessary requirement for this is to have an already setup Zadarma PBX integration with Bitrix 24. You can find the relevant instructions for the integration setup here.
Advantages:
- The cost of calls according to your Zadarma price plan.
- The shortest possible delays during the call, as the call will pass via the data center nearest to your location.
- Free call recordings that will be saved on the Zadarma cloud and in Bitrix24.
- Automatic lead creation at the time of an outgoing call to a new phone number.
Setup instructions
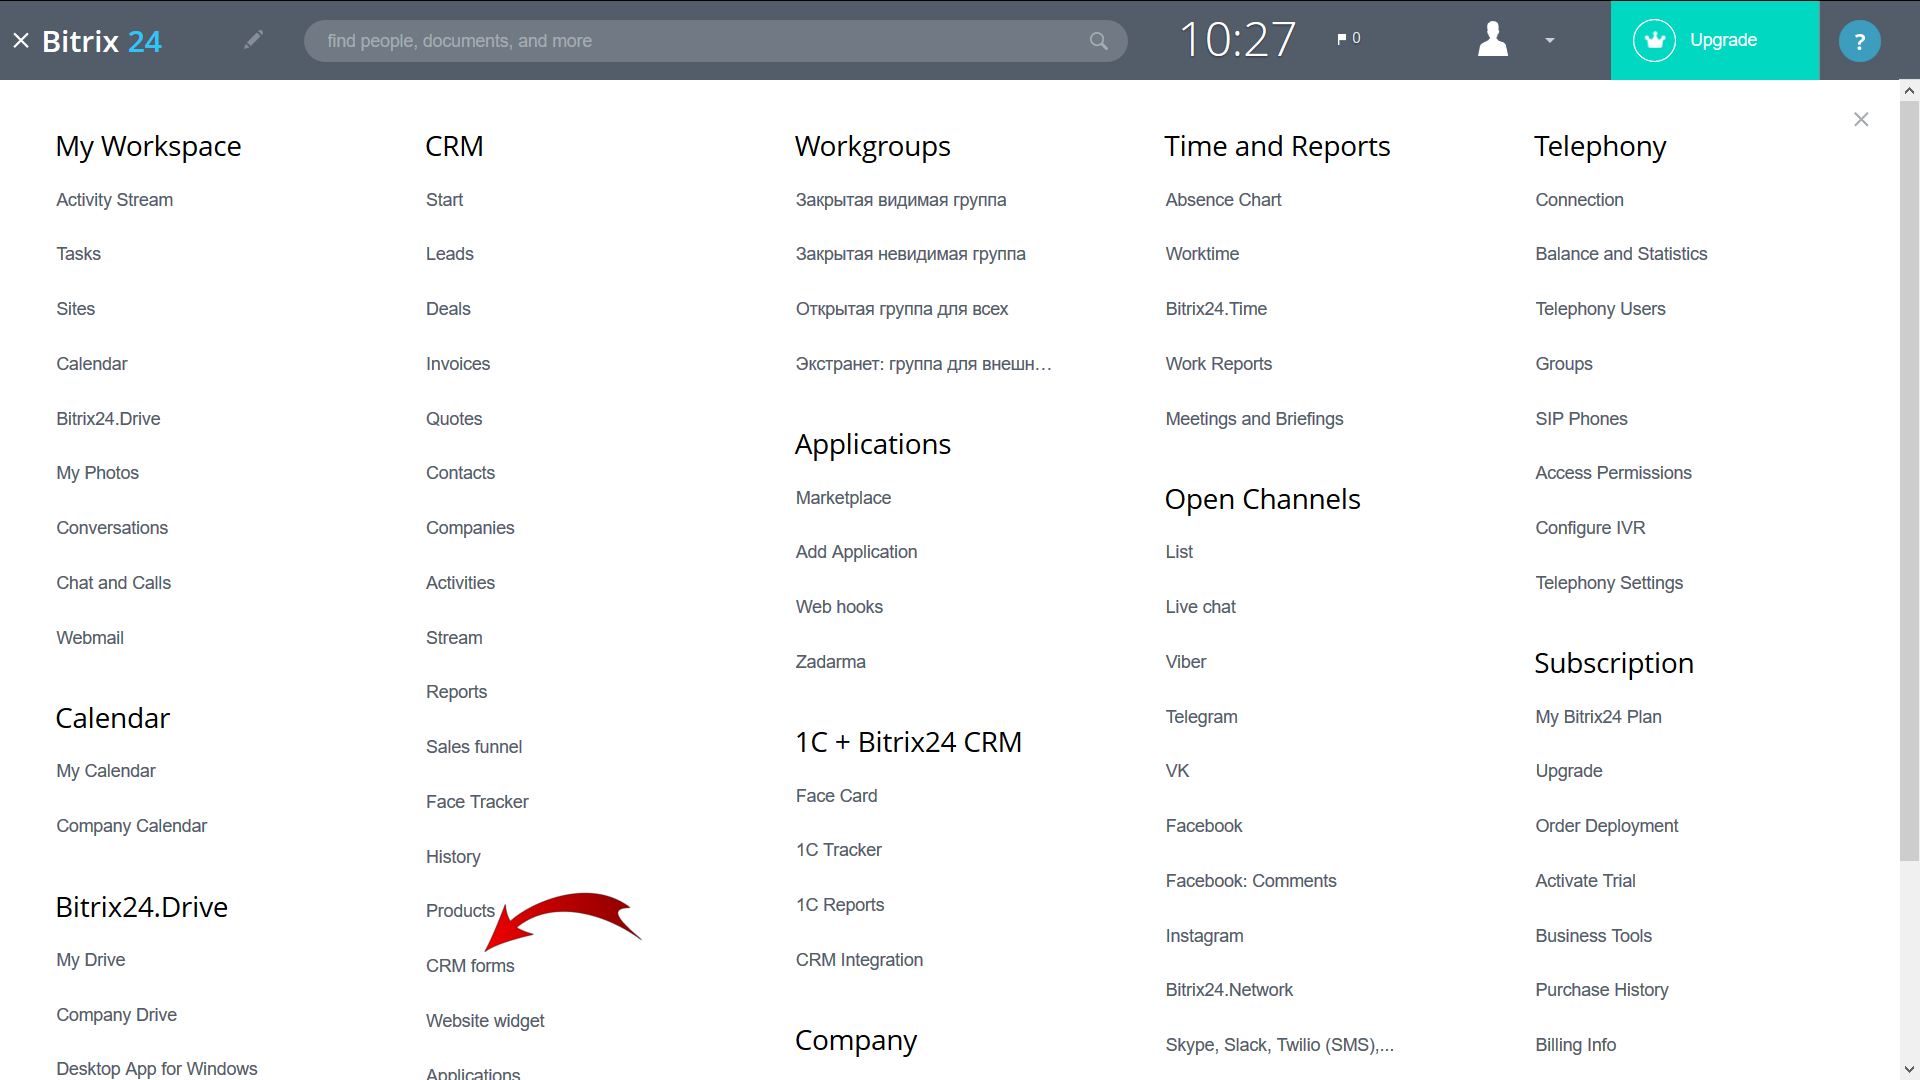
1. In Bitrix 24, at the top left corner of the page, click on the Menu button and choose the CRM-forms in the “CRM” section.
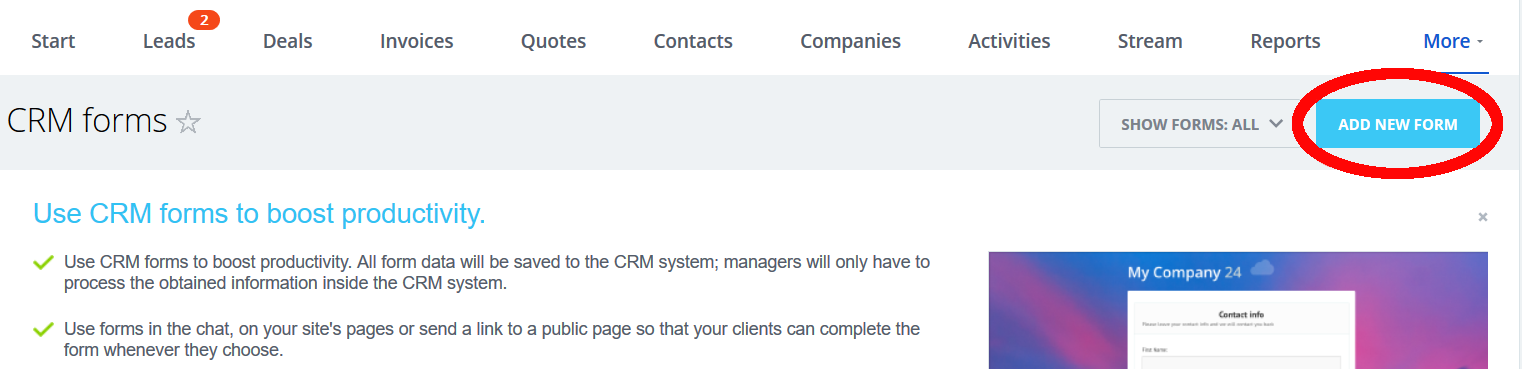
2. Click on “Add new form”, in the right top corner of the page.
3. Enter the title of the form (for example: Zadarma) and the form description. In the right side of the page choose “Contact - Phone”. As a result, a “Phone” window will be created on the left side of the page. This is where the clients will fill in their phone numbers.
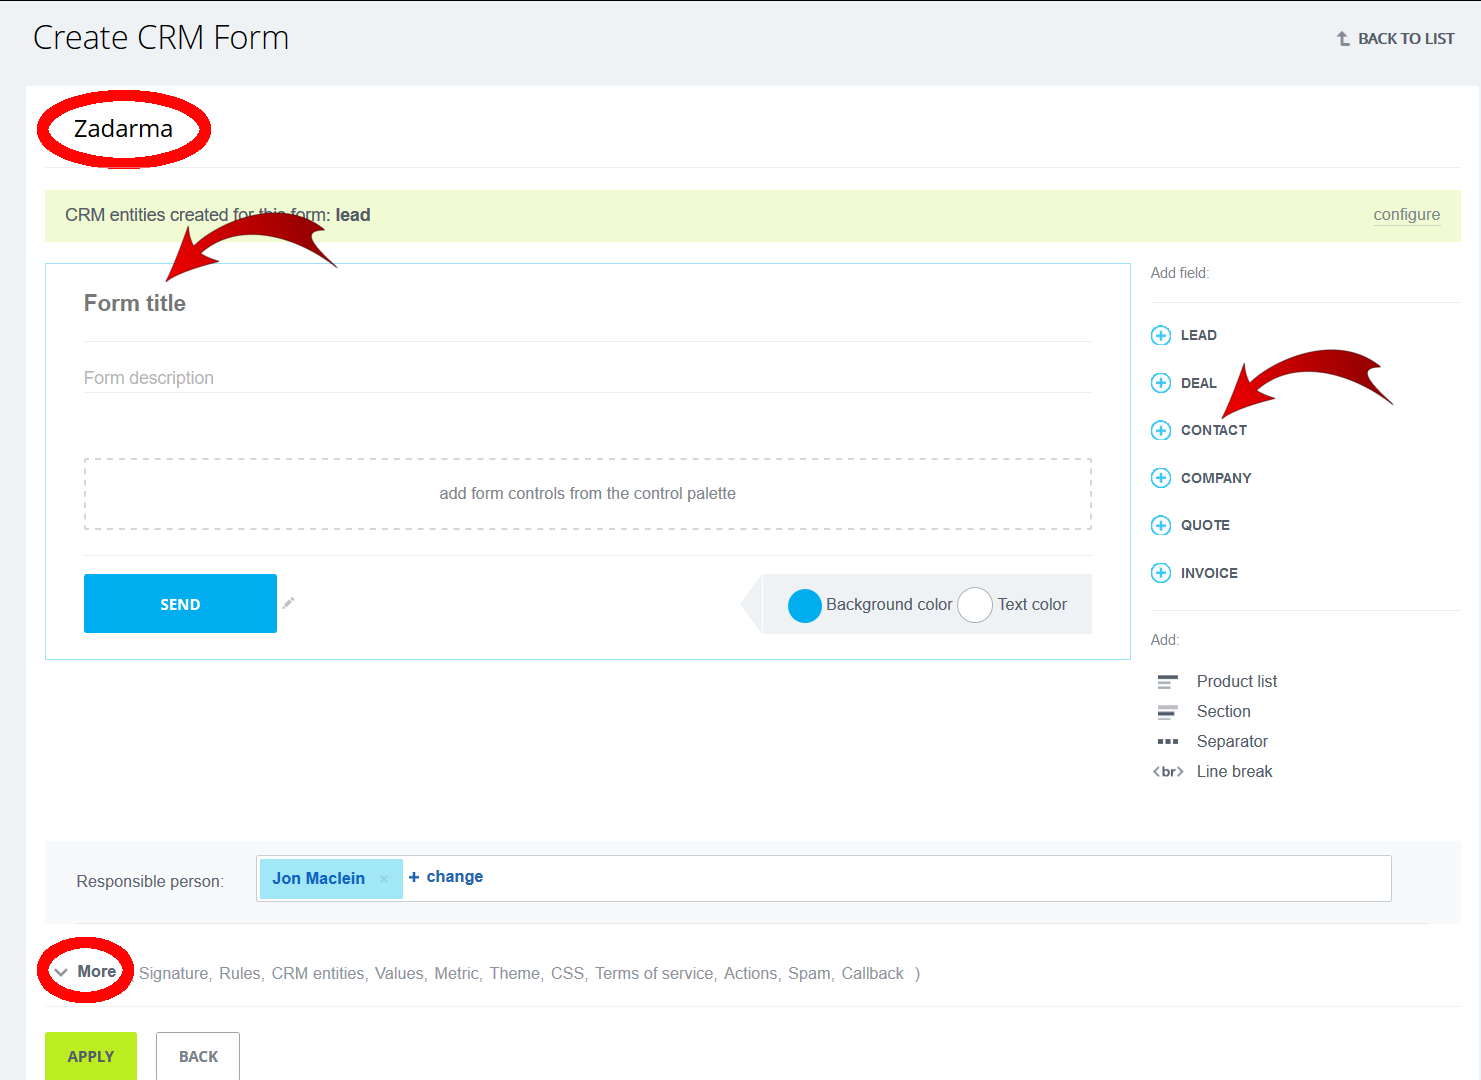
4. Open the “More” section (highlighted on the screenshot). In the “Callback” field, click on the “This is a callback form”, select “Application: Zadarma” and click on “Apply”.
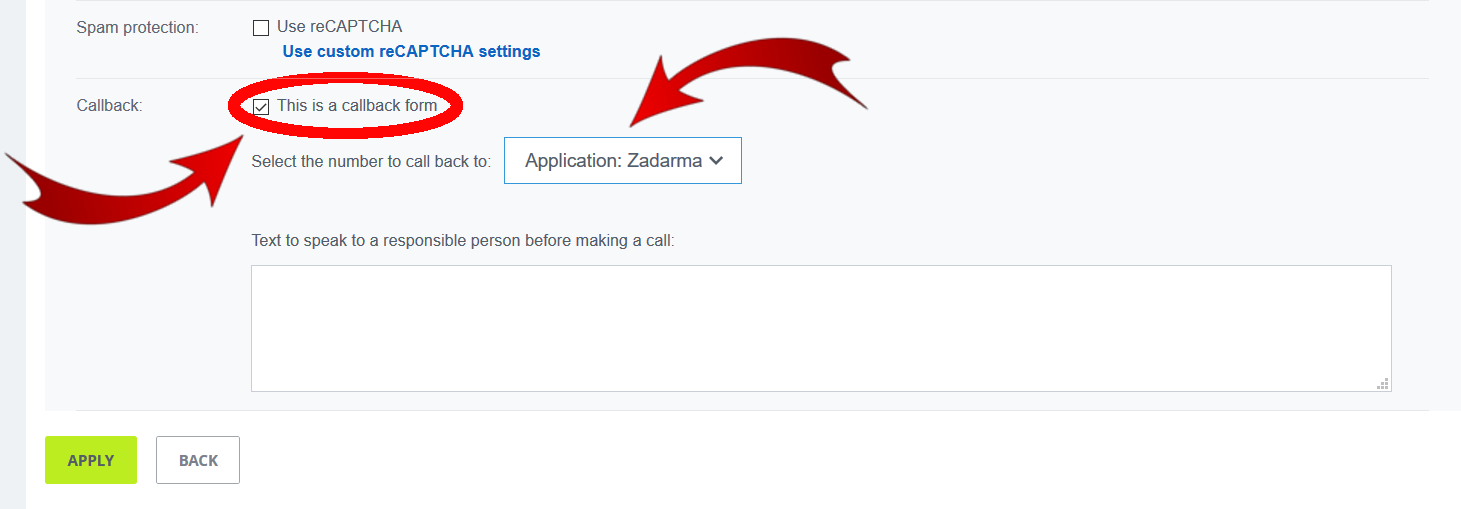
After clicking on “Apply”, you will be redirected to the page where you will be able to create a new form.
5. On the next page, click on “Back to the list” and in the new form click on “On”.

6. Open the Bitrix24 Menu, and in the “CRM” section, choose “Website widget”. In the top panel of the page click on “Create Widget”.
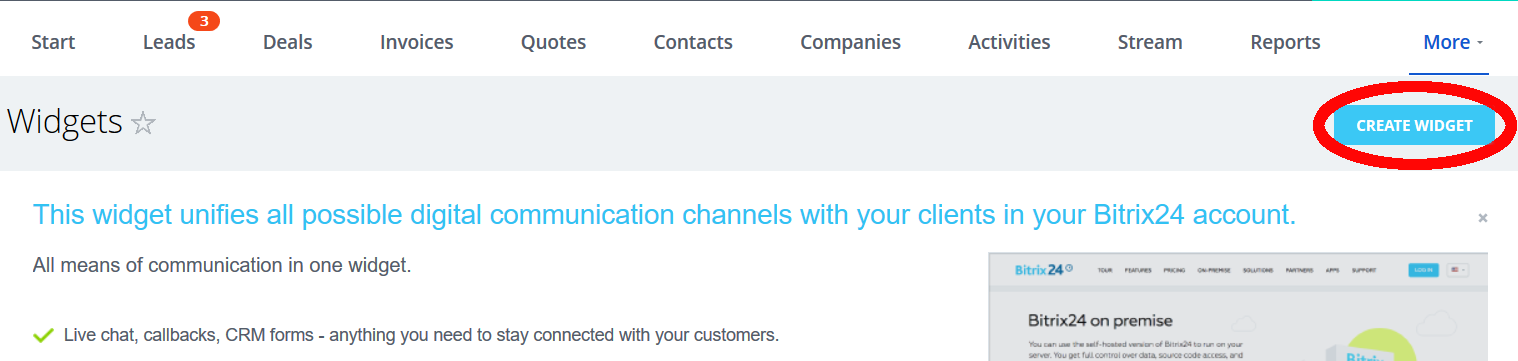
Make sure you enter the Widget name.

7. In the “Callback” section, click on the options tab and choose the previously created CRM-form, in the “Zadarma” example.
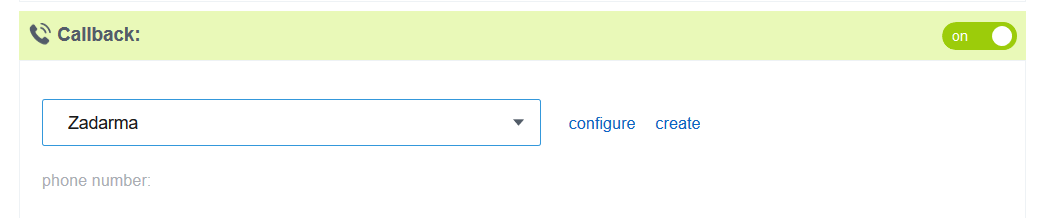
Configure the rest of the widget parameters, according to your needs, and click on “Apply” at the bottom of the page.
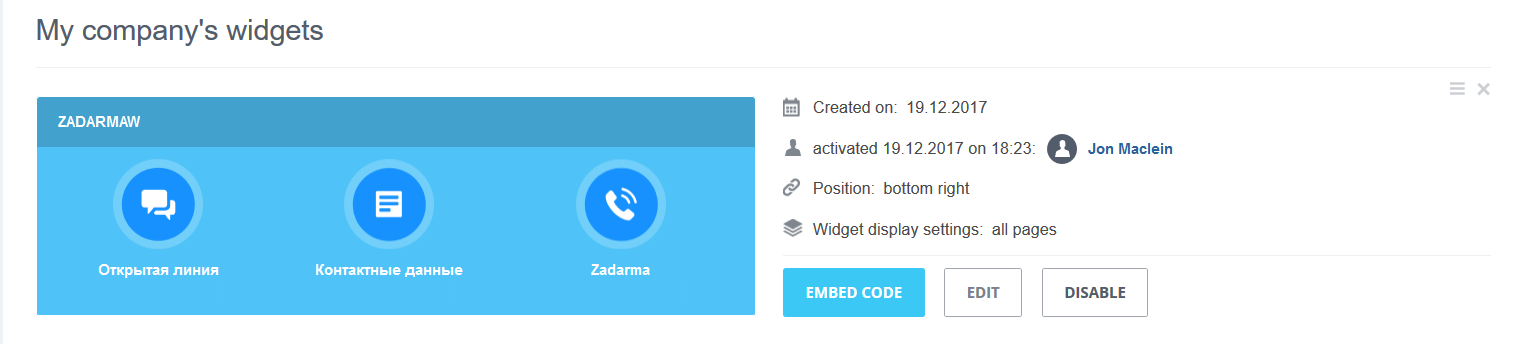
8. The callback widget has been created and you can place it on your website. To receive the code, click on “Embed code”.