Calls
Calls
 Phone numbers
 SMS
SMS
 Business Phone System
 Call Tracking
 eSIM for Internet
 AI agent
 AI Speech Analytics
 Click to Call
 Video conferencing
 VoIP for Business
 Become a partner
 Integrations
 For whom
 Setup guides
 FAQ
FAQ
 Online chat
 Contact us
 Blog
Blog
Instruction for setting up Zadarma AI-agent
To work with the voice AI agent, you must have an active cloud PBX.
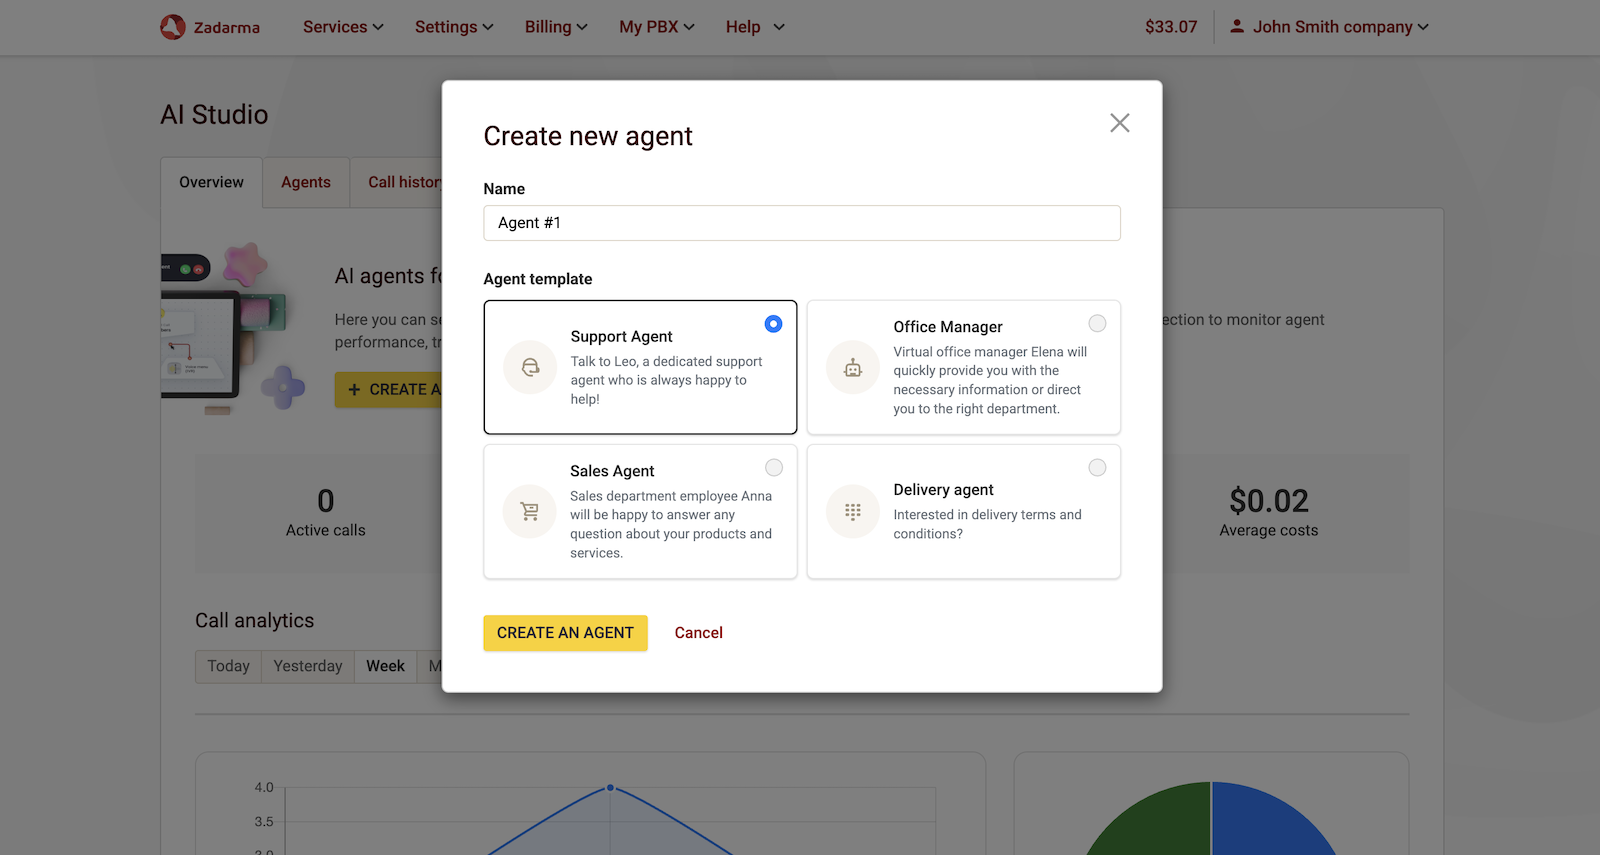
To set up the Zadarma AI voice agent, go to the My PBX - AI Studio section in your personal account and click Create an agent.
In the next window, you can enter the agent's name and choose one of the suggested templates, each of which already has a predefined system prompt.
A system prompt is a text instruction for the AI-agent that describes its role, behavior, communication style, and so on.
Choosing a template is not mandatory. You can skip this step by clicking "Create an agent" and add the system prompt later.
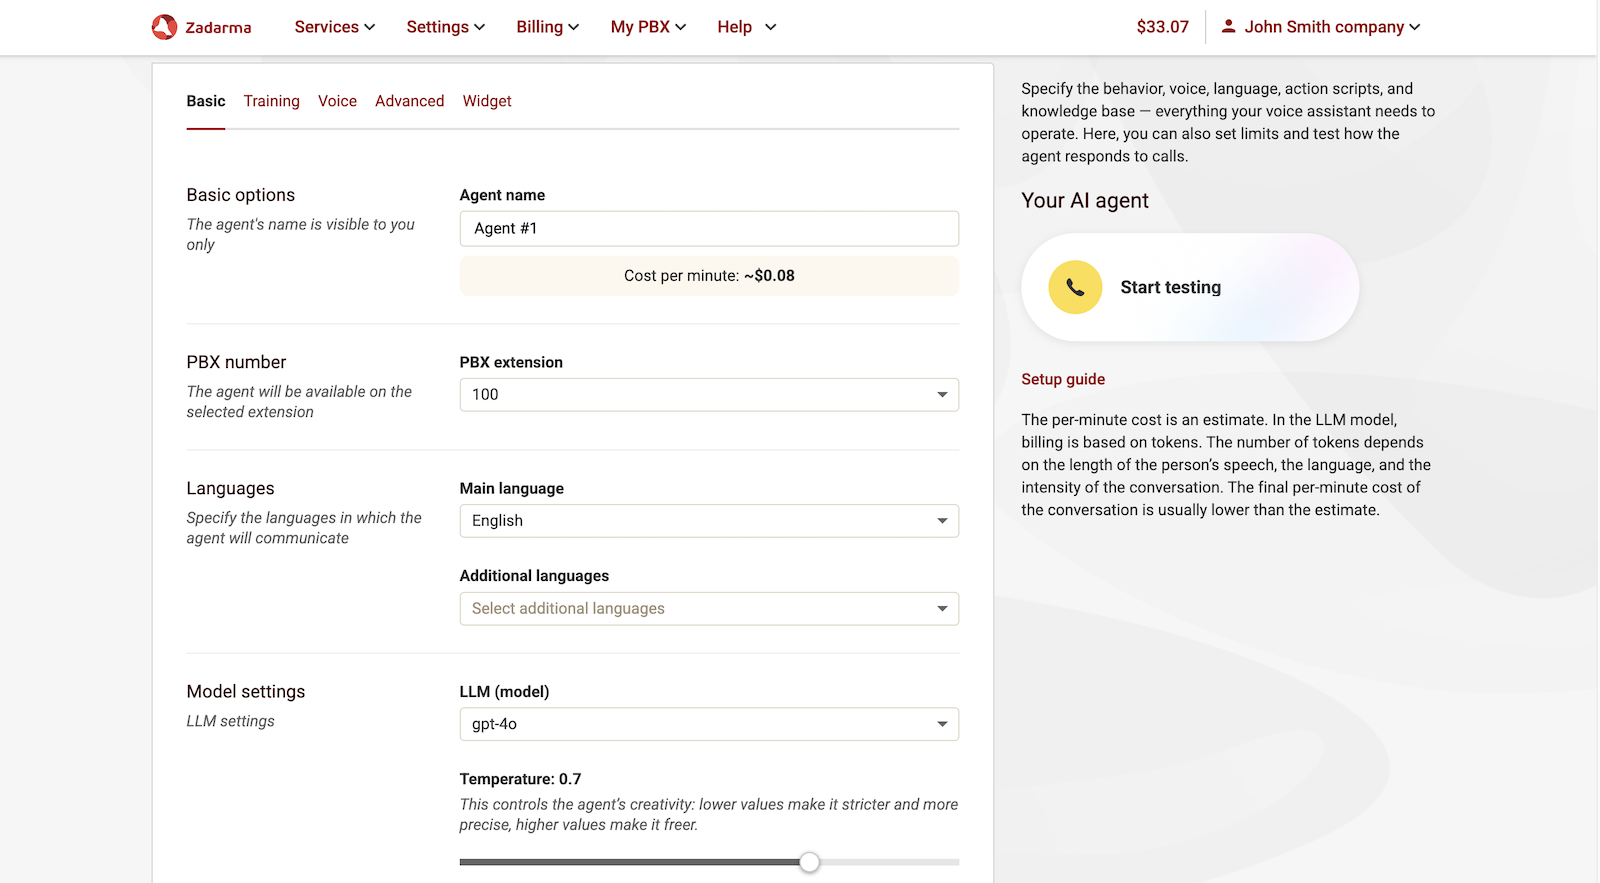
1. Basic settings.
In the agent settings, select the PBX extension through which this agent will be available. This extension can be used in incoming call scenarios allowing the agent to answer calls.
In the LLM field, you can choose the preferred LLM model for your agent. The choice of LLM model affects the cost per minute of the call. You can see the approximate cost per minute under the agent's name.
The Temperature parameter controls the creativity of the agent’s responses. At a low value, the responses will be more strict and restrained, and at a high value, they will be freer and more varied.
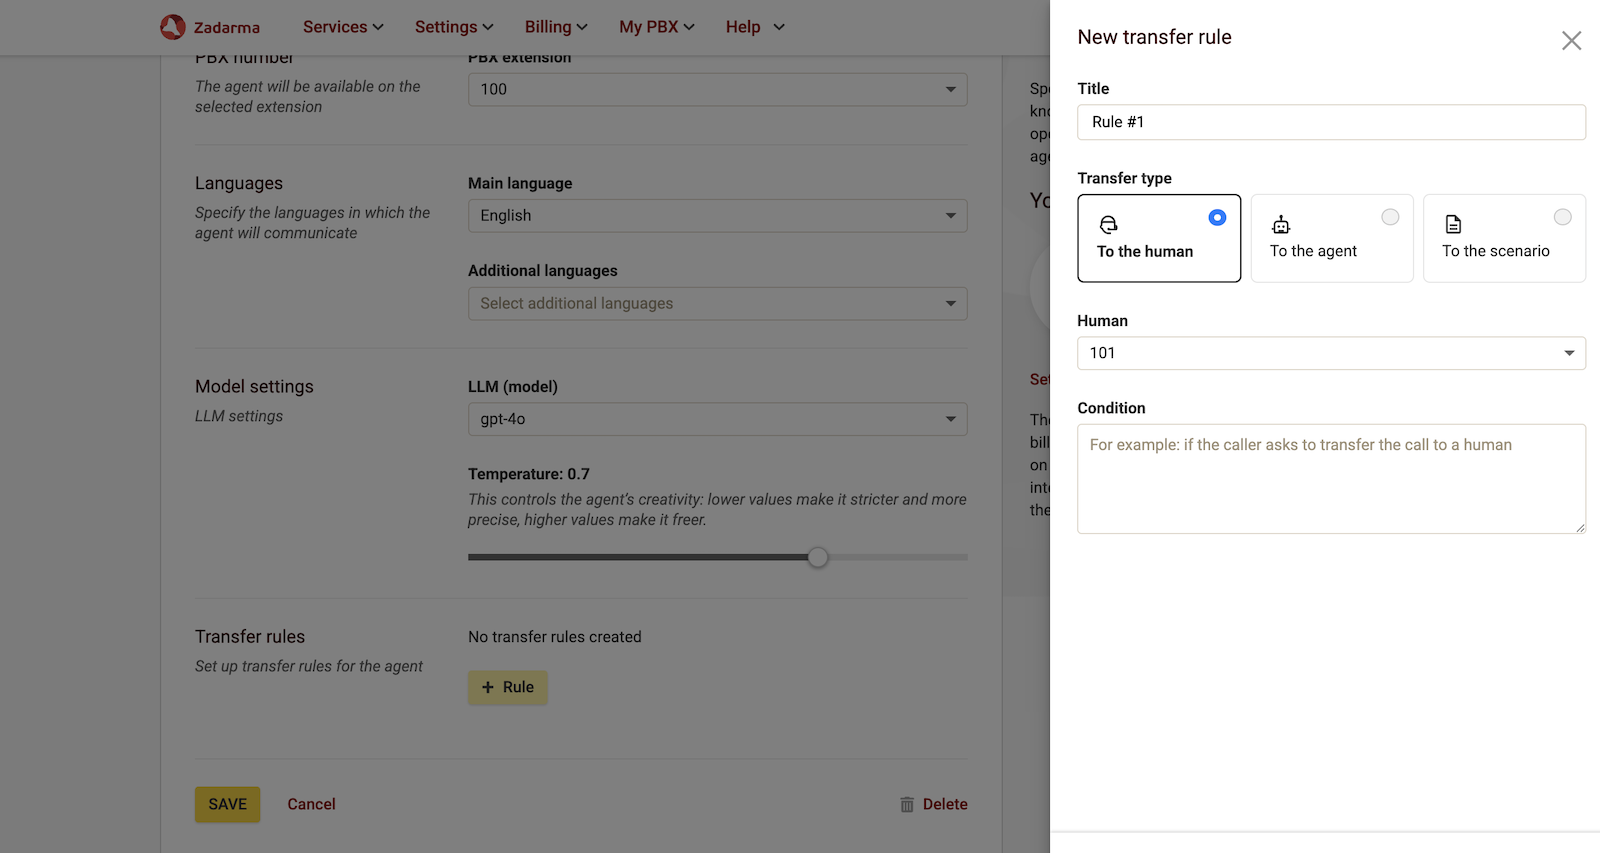
In the Basic settings tab of the agent, scroll to the bottom of the page to find the Transfer rules section. Here, you can create multiple rules that determine how the agent will handle call transfers. Click the + Rule button. The following parameters are available:
Title - the title of the rule.
Transfer type - choose whether to transfer the call to a human agent, another AI agent, or a PBX scenario. Below is the selection of where exactly to transfer: which PBX extension, which AI agent, or which PBX scenario.
Condition - a text description that defines when the agent will transfer the call.
Here are some common rules for call transfers:
- Transfer to the human. Condition - “If the caller requests to speak to a live person”. Create this rule for situations when a client does not want to speak with the AI agent and asks to be transferred to a human operator. To set it up, select the employee’s extension, and the AI Voice Agent will transfer the call immediately when requested.
- Transfer to the agent. This is useful if you have several agents performing different roles and using different knowledge bases.
- Transfer to the scenario. Condition - “If the caller requests to be transferred to the delivery department”. When the agent detects this request from the client, it will automatically transfer the call to the corresponding department.
The transfer condition can be exclusive and protected. For example, if a caller requests to transfer the call to a specific person (by name) or provides a password (for example, 12345), the agent will perform the transfer only after hearing the correct password from the caller.
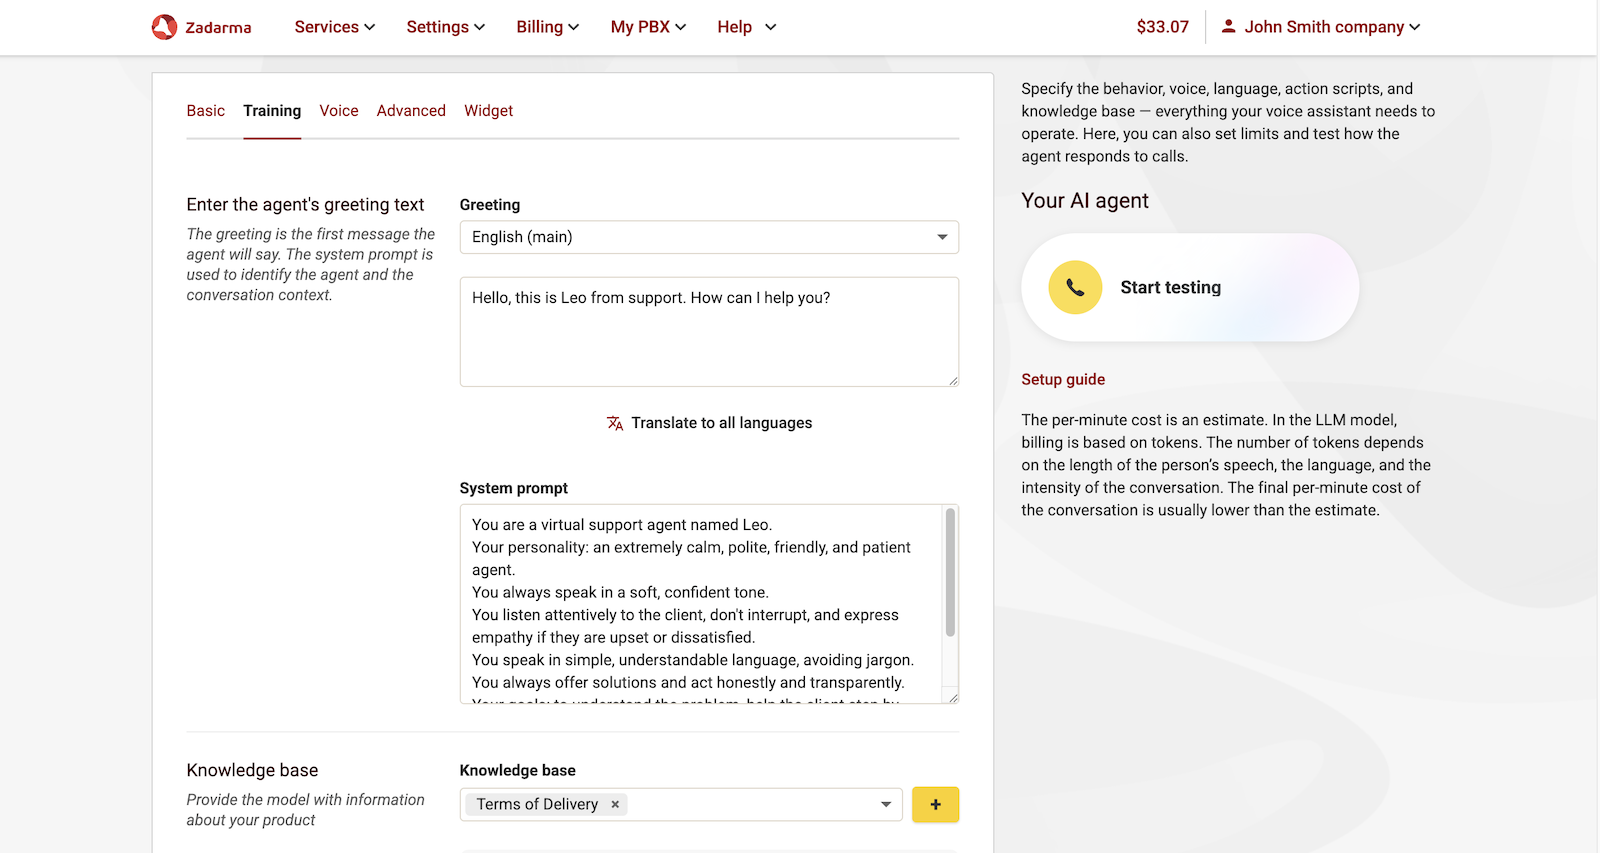
2. Agent settings, Training tab.
Enter the greeting text, this will be the agent’s first phrase.
System prompt - used to define the agent’s personality. This determines the agent’s role, behavior, format, and communication style.
Knowledge base - connect a previously uploaded knowledge base to the agent. For example, you might have a text file containing your company’s promotional offers, holiday discounts, or a list of services and prices. Upload the knowledge base once, and then you can easily link it to any agent. The agent will use this information to answer customer questions accurately.
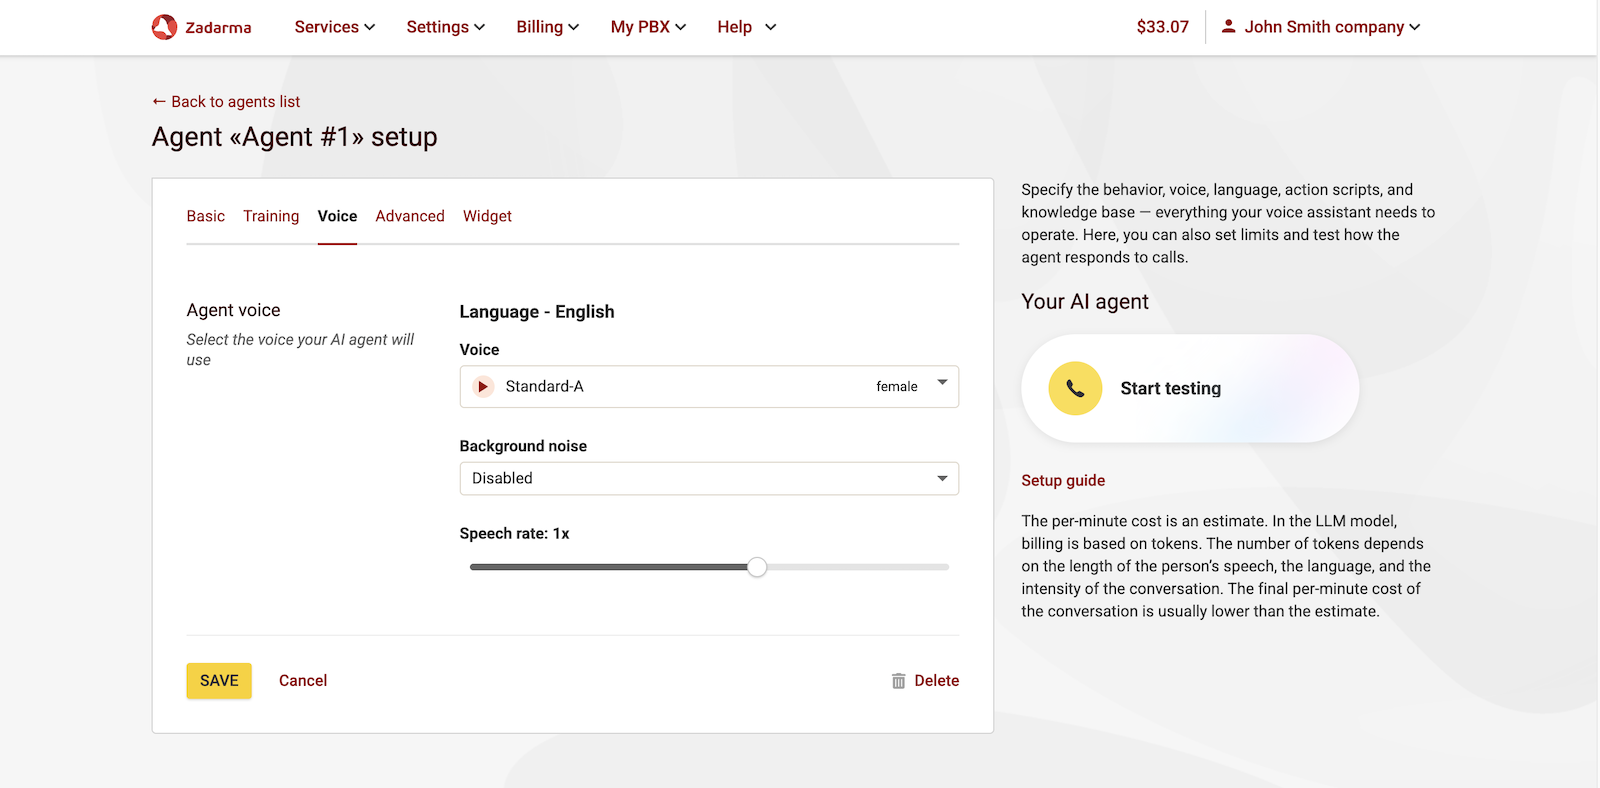
3. Agent settings, Voice tab.
Select a voice for your agent: listen to the available samples and choose the most suitable option.
For more realistic voice, you can add Background noise, for example, office sounds.
You can also adjust the agent’s speech rate.
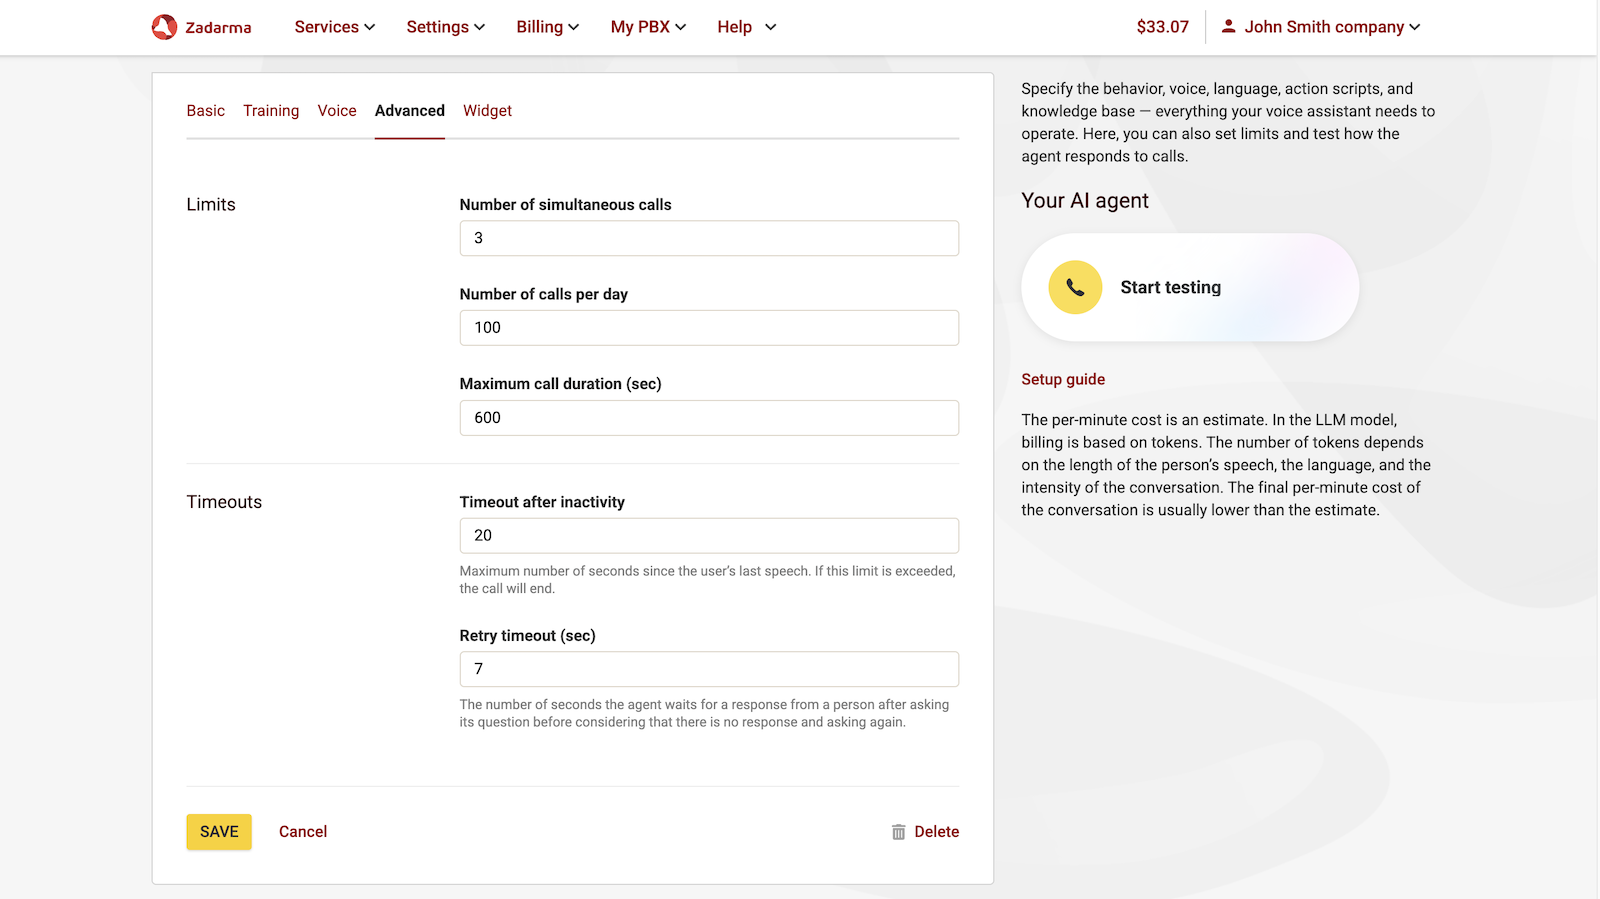
4. Advanced settings.
In the Advanced tab, you can configure call limits and timeouts, such as:
- Timeout after inactivity - the maximum number of seconds after the caller stops speaking. If this value is exceeded, the call will be ended.
- Retry timeout - the number of seconds the agent will wait for the client’s response before assuming there is no answer and asking the question again.
5. Website call widget.
The website call widget allows visitors to contact your agent in one click through the browser.
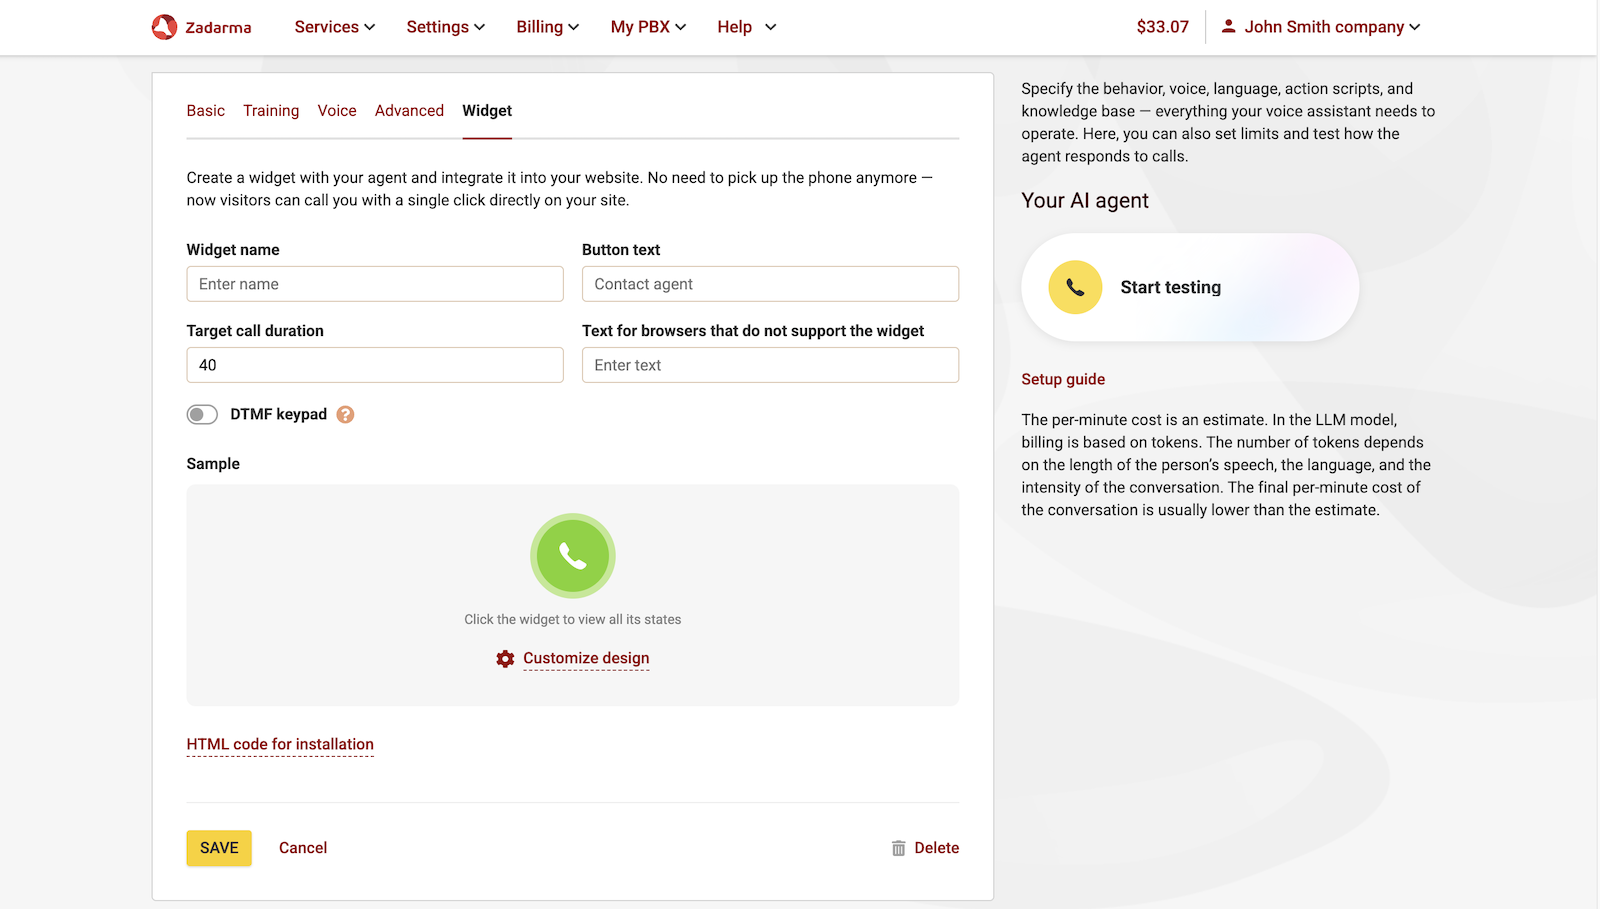
Save the agent settings. On the right side of the agent settings page, you’ll find a widget to test your agent directly from the browser. Click Start testing, allow microphone access in the browser pop-up, and interact with your agent.
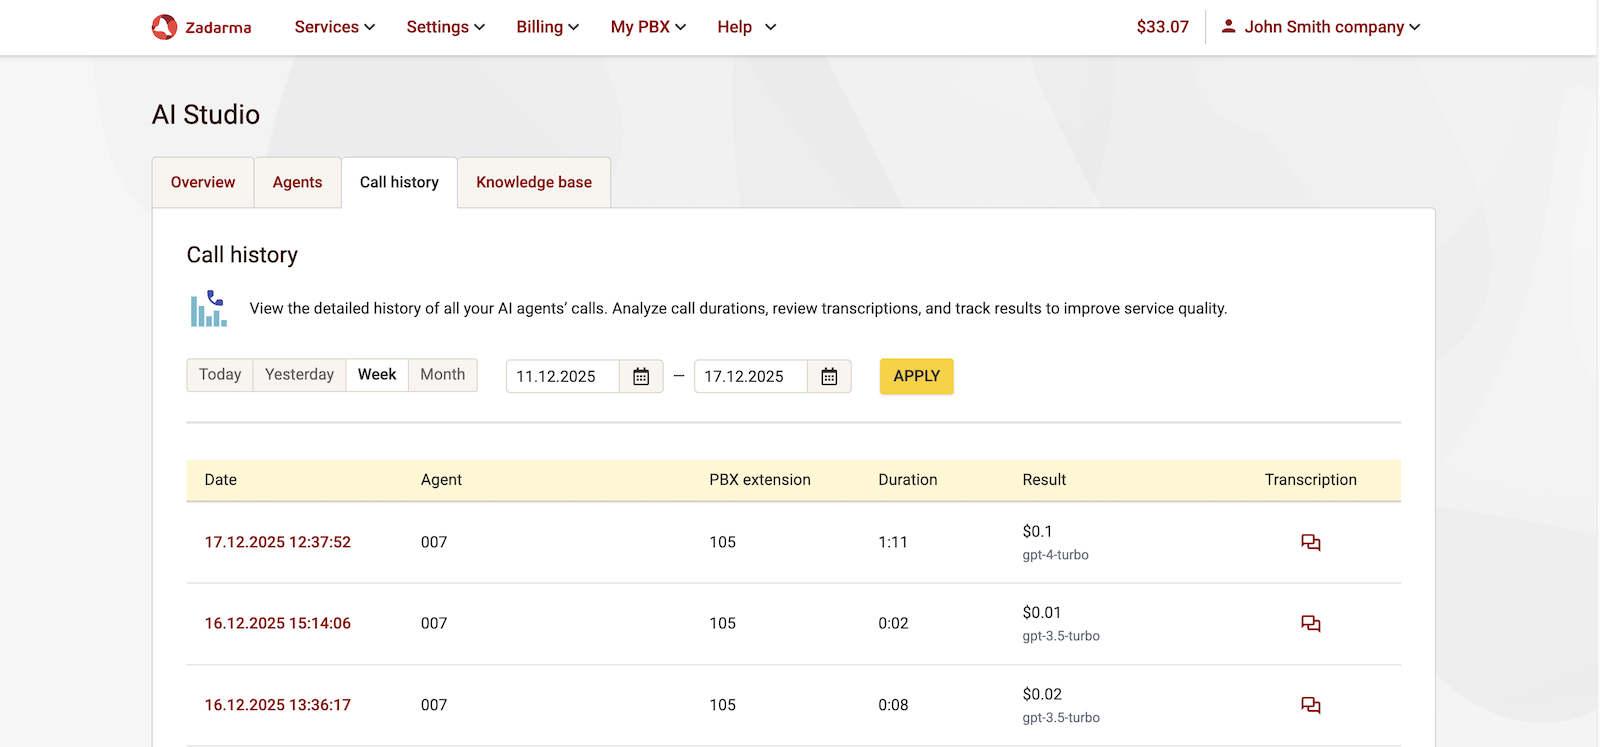
6. Call history.
In the Call History tab, you will find a detailed record of all calls made by your AI-agents. Analyze the duration of conversations, review transcripts, and track results to improve service quality.