 Calls
Calls
 Phone numbers
 SMS
SMS
 Business Phone System
 eSIM for Internet
 AI agent
 AI Speech Analytics
 Click to Call
 Call Tracking
 VoIP for Business
 Become a partner
 Integrations
 For whom
 Setup guides
 FAQ
FAQ
 Online chat
 Contact us
 Blog
Blog
1. To enter the phone's web interface enter device's IP-address in URL bar.
To attain the phone's IP address, press the "Menu" button (Page) and select Network => CurrentIP
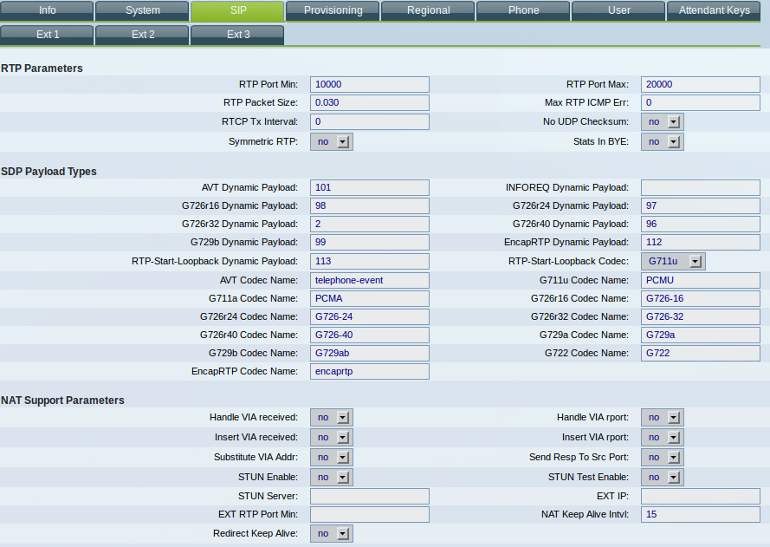
In right top corner of page change to mode Advanced
Open SIP and specify range of RTP ports.
RTP Port Min: 10000
RTP Port Max: 50000
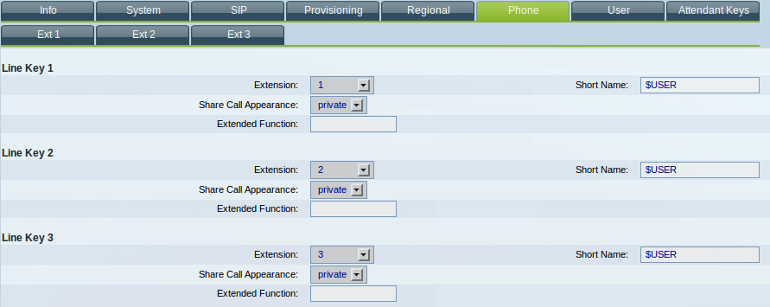
2. If you require the use of more than one line, it is necessary to set up a separate extension for of the phone's buttons.
3. Open Ext1 and enter the following data:
Subsription Expires: 300
NAT Mapping Enable: no
NAT Keep AliveEnable: yes
Proxy: sip.zadarma.com
Display Name: Your sip number (for example 111111) from personal account
UserID: Your sip number (for example 111111) from personal account
Password: Your password of sip number, from "SIP Connection" in personal account.
Proxy: pbx.zadarma.com
Display Name: Your internal PBX number (for example 1234-100) from personal account
UserID: Your internal PBX number (for example 1234-100) from personal account
Password: Your password of extension number of PBX from personal account
Resident Online Number: Your sip number (for example 111111) from personal account
Preferred Codec: G711a
Second Preferred Codec: G711u
Third Preferred Codec: G729a

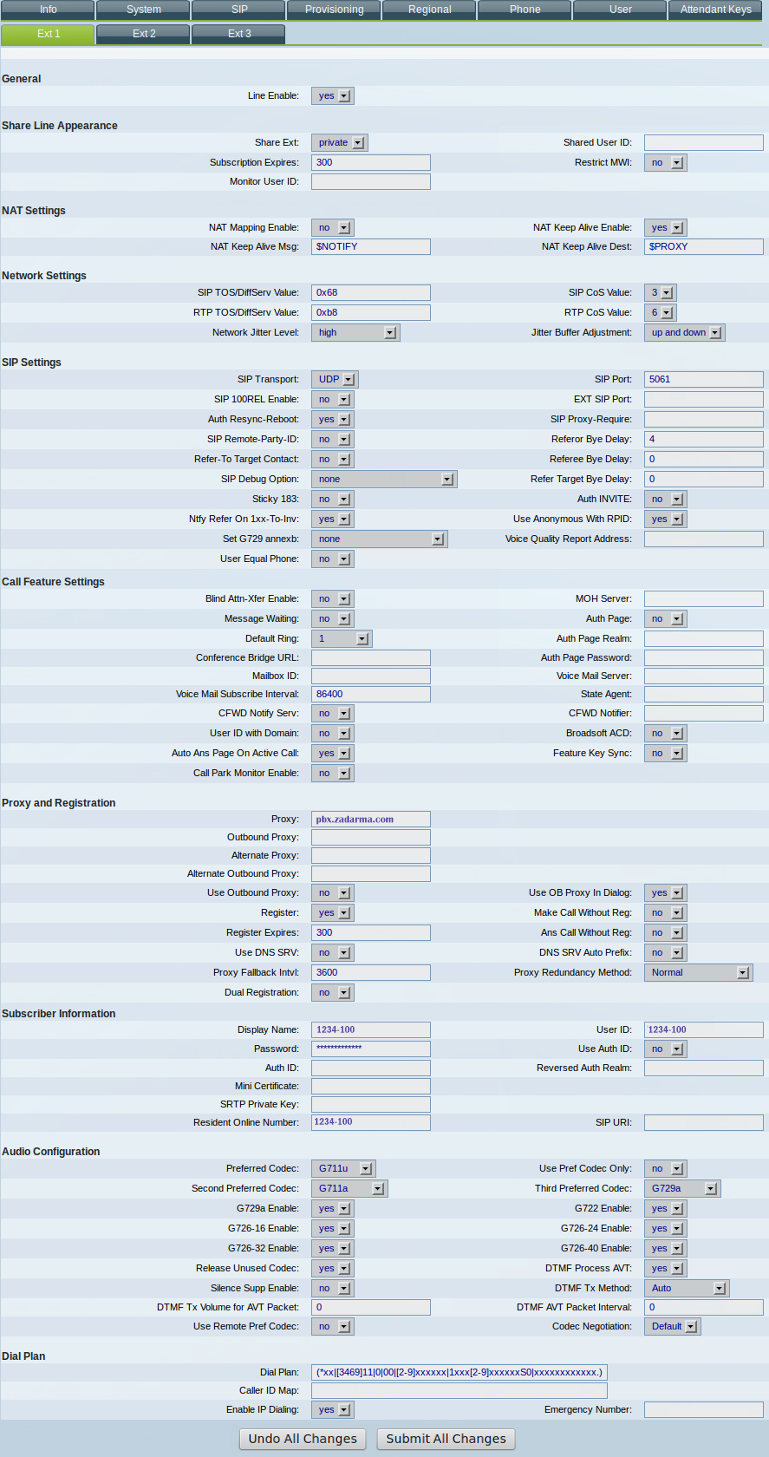
To save changes click on Submit All Changes