Calls
Calls
 Phone numbers
 SMS
SMS
 Business Phone System
 Call Tracking
 eSIM for Internet
 AI agent
 AI Speech Analytics
 Click to Call
 Video conferencing
 VoIP for Business
 Become a partner
 Integrations
 For whom
 Setup guides
 FAQ
FAQ
 Online chat
 Contact us
 Blog
Blog
Setup guides / Clientify
Integration of the free Zadarma PBX with Clientify works without additional modules or intermediaries, ensuring maximum quality and reliability.
The Zadarma - Clientify integration is completely free.
Integration features
- Call contacts directly from Clientify in one click.
- Webphone for making and receiving calls.
- Call history directly in Clientify with the ability to listen to and download call recordings.
Advantages of Zadarma:
- Completely free PBX, setup in 5 minutes;
- Pricing plans for cost-effective calls to all destinations;
- Multichannel phone numbers in 110 countries worldwide (landline, mobile, 800);
- Maximum quality and reliability (over 19 years of operation, data centers in 6 countries, 24/7 support).
Setup guide
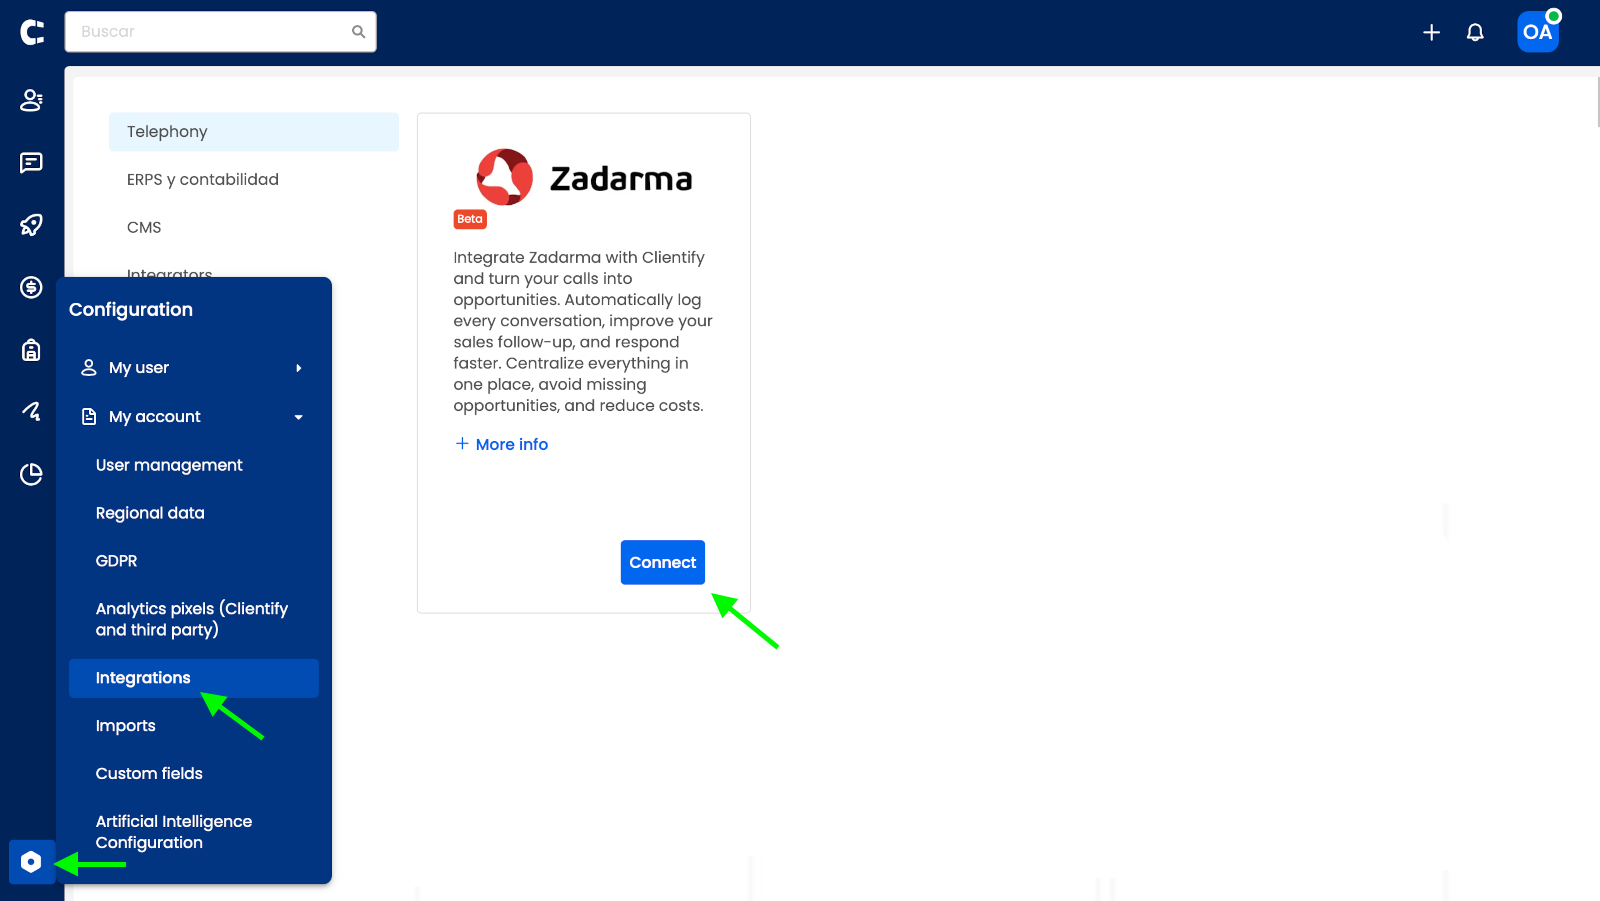
1. In your Clientify account, go to the "Settings" - "My account" - "Integrations" section, find the Zadarma app and click Connect.
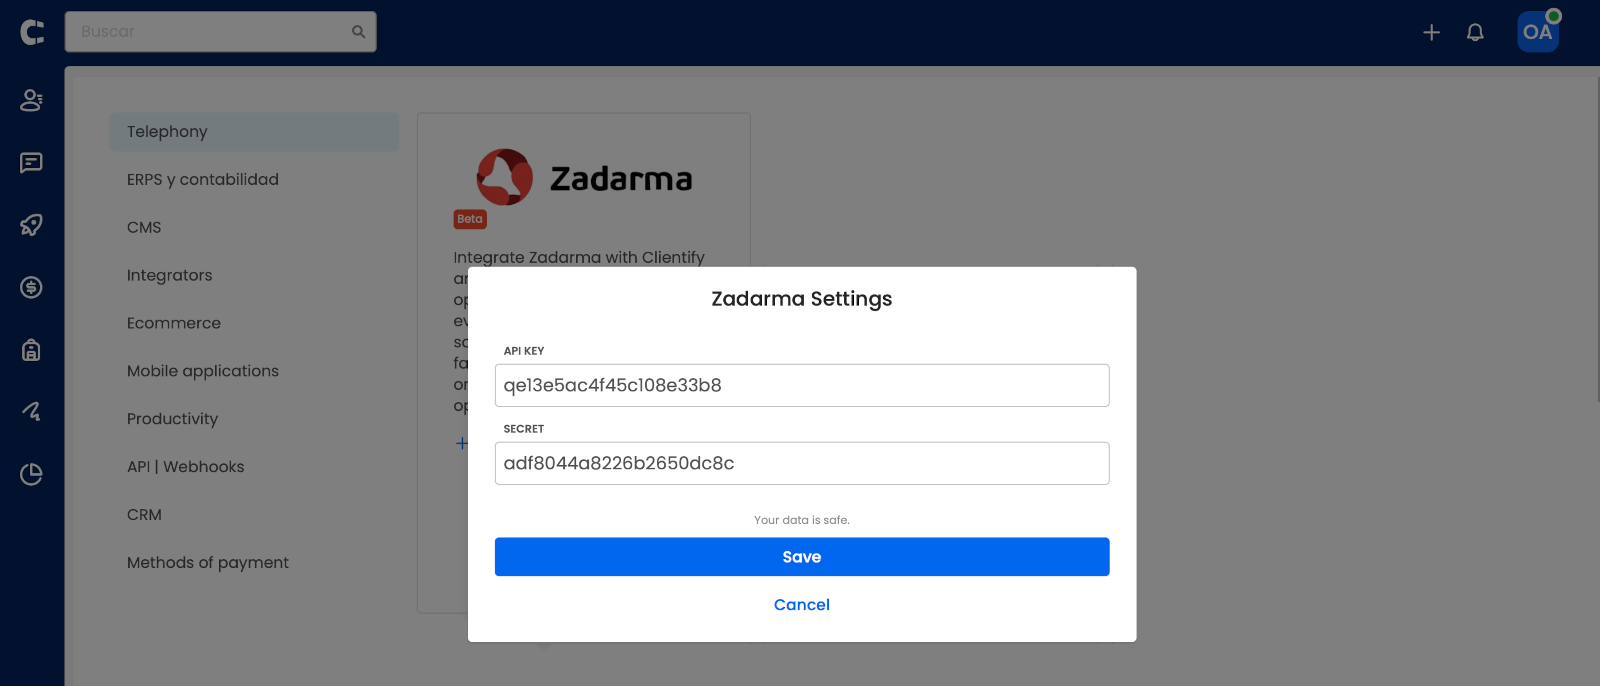
2. In the next window, enter the "API KEY" and "SECRET" which can be found in your Zadarma account under the section Settings - Integrations and API. Copy the API KEY and SECRET and paste them into the corresponding fields in Clientify, click Save.
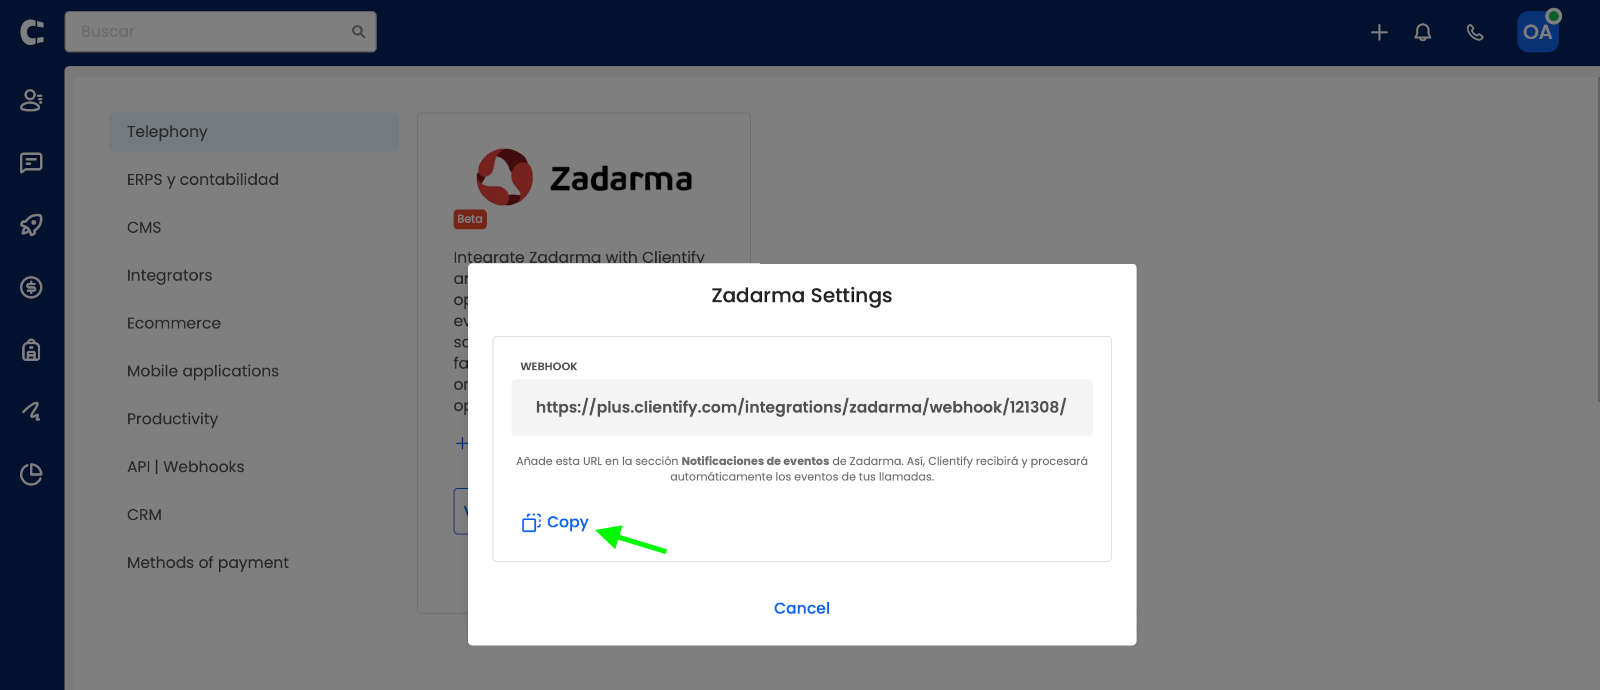
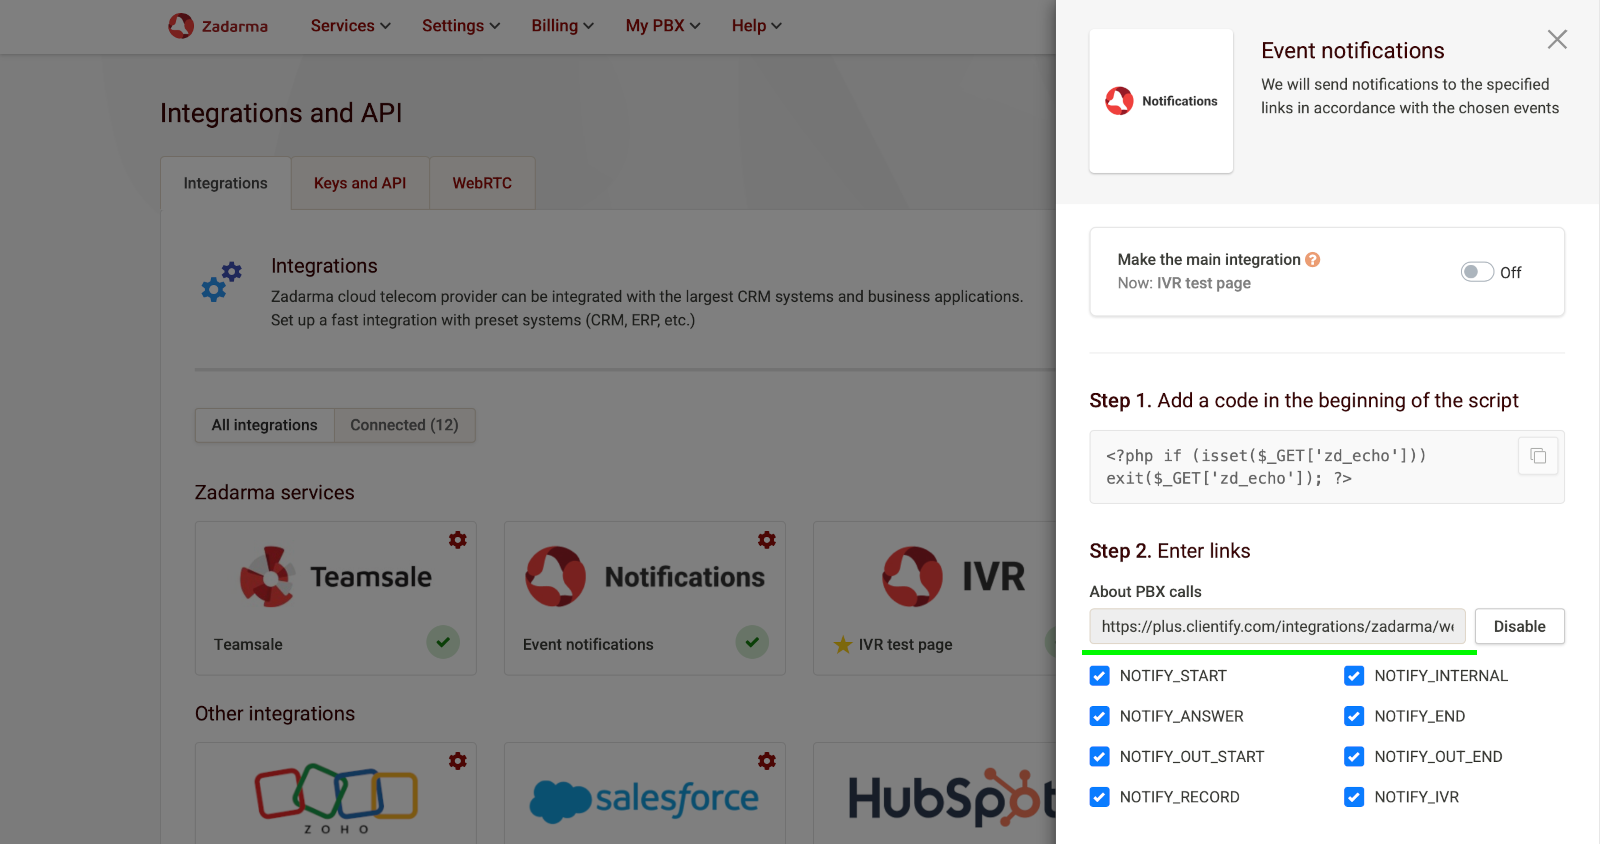
3. Click "Ver WEBHOOK" and copy the URL.
4. Go to the browser tab with your Zadarma account Settings - Integrations and API section, click on Notifications and paste the URL into the "About PBX calls" field. Then, click the Enable button.
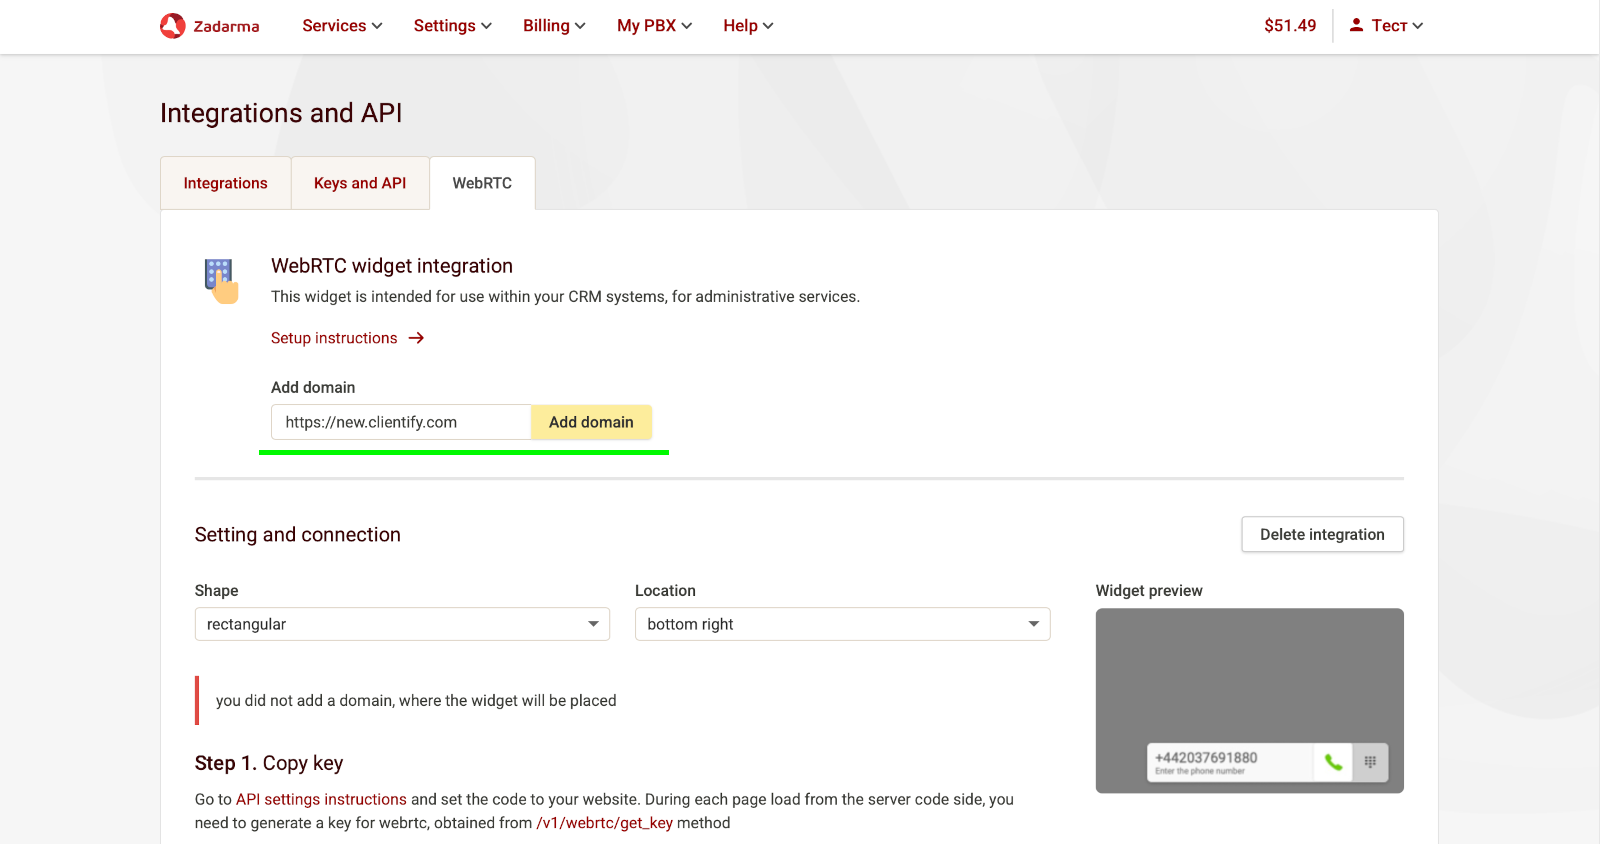
5. In the Settings - Integrations and API section, go to the WebRTC tab and enter the URL https://new.clientify.com, then click the Add domain button.
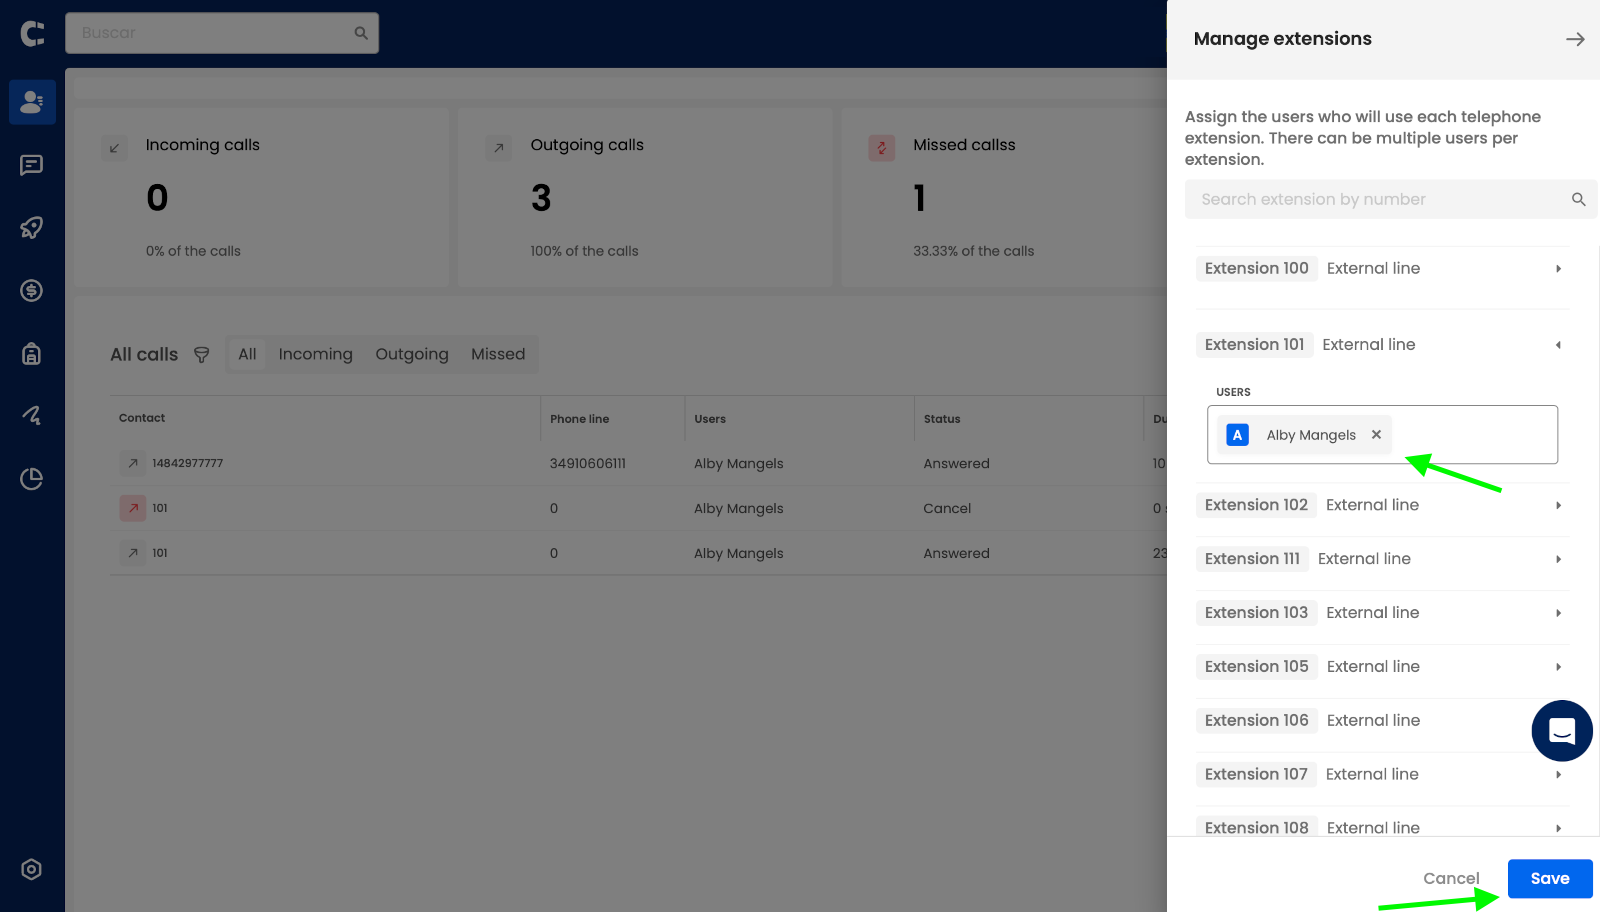
6. Now assign the Zadarma PBX extensions to your Clientify users. In your Clientify account, in the Contacts - Telephony section, click the settings button ⚙️
Click on the PBX extension, choose the Clientify user to assign it to, and save the telephony settings.
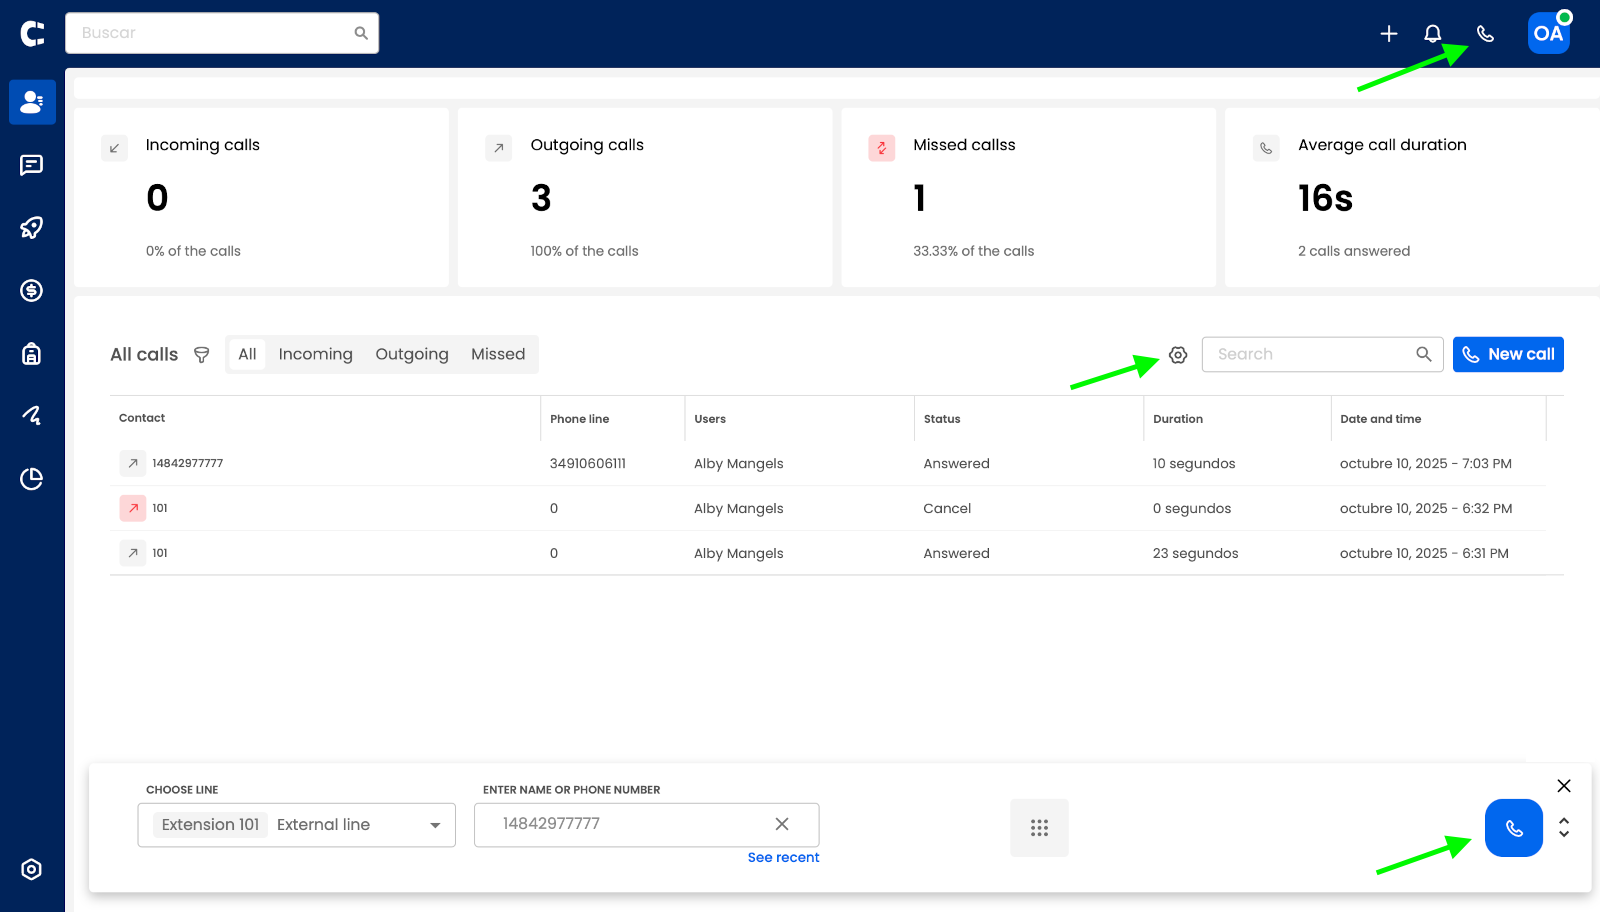
Integration setup is complete. To make an outgoing call, click the phone icon in the top-right corner of the page to open the webphone and enter a number, or open any contact and click the call icon next to their number.
Please note: for the first call, make sure to grant access to your audio devices in the browser pop-up.
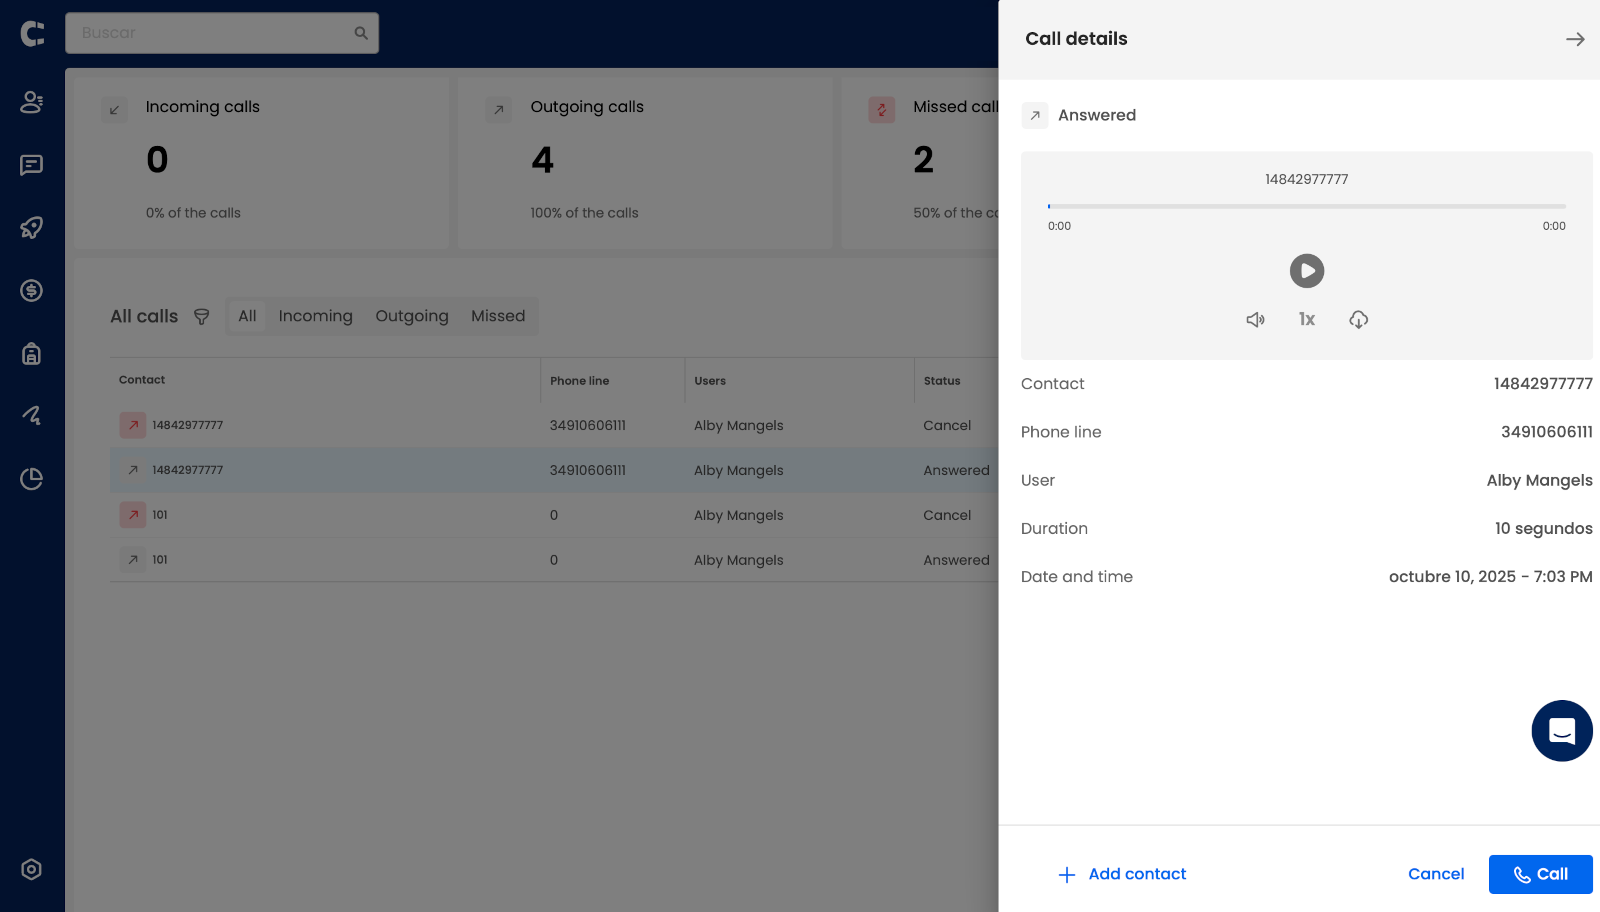
Call history is available in the Contacts - Telephony section. Click the View icon next to a contact to see detailed call information and listen to the recording.