 Calls
Calls
 Phone numbers
 SMS
SMS
 Business Phone System
 eSIM for Internet
 AI agent
 AI Speech Analytics
 Click to Call
 Call Tracking
 VoIP for Business
 Become a partner
 Integrations
 For whom
 Setup guides
 FAQ
FAQ
 Online chat
 Contact us
 Blog
Blog
Setup guides / Zoho
The Zadarma PBX integration with Zoho CRM works without additional modules and agents to provide maximum service quality and reliability.
Zadarma - Zoho CRM integration is totally free.
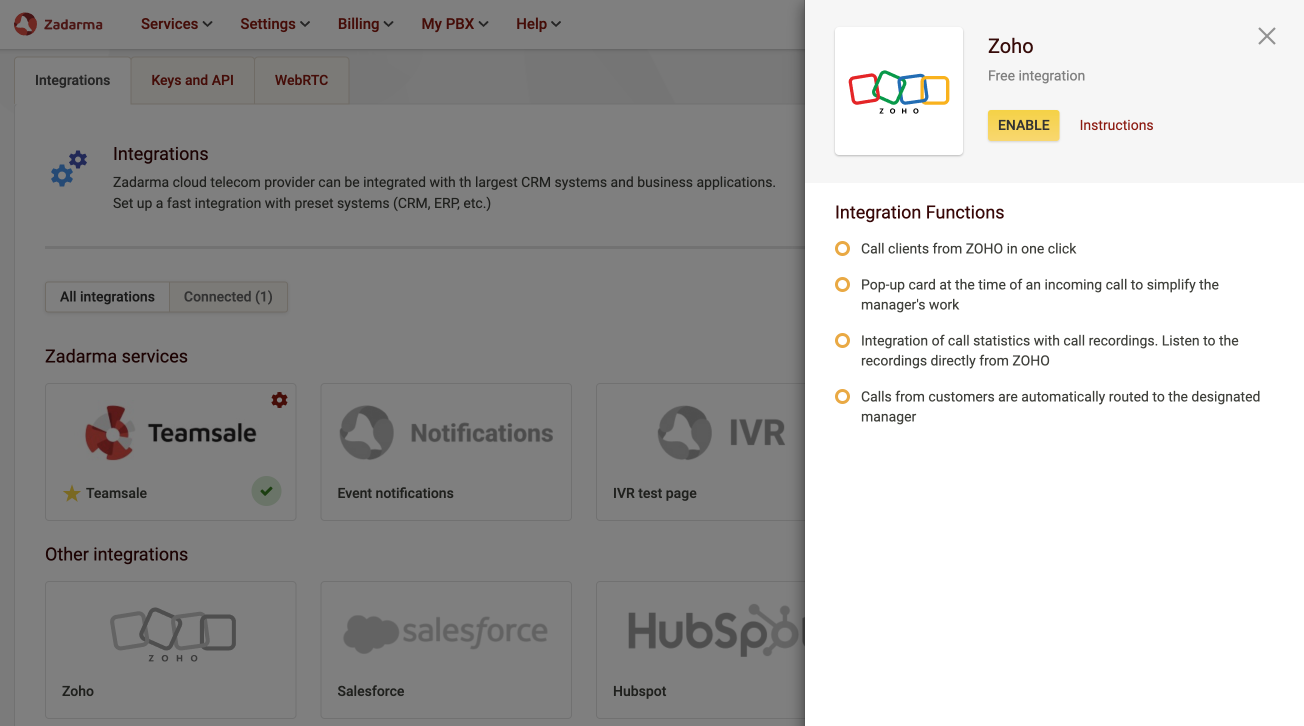
Integration functions:
- Make calls to clients from Zoho CRM in one click.
- Use the customer pop-up card feature when receiving incoming calls.
- Listen to call recordings via the Zoho CRM interface.
- Client calls are routed to the appropriate personal manager and redirected if the manager is busy.
Zadarma PBX advantages:
- Free Multifunctional PBX.
- Easy PBX setup in 5-10 minutes.
- Free additional features such as Callback widget or Click to call button and integration with popular instant messengers.
- Connection of an unlimited amount of phone numbers from 110 countries (including toll free numbers).
Setup Instructions
1. To set up the Zadarma PBX with Zoho, the following requirements need to be met:
- You should be using Zoho CRM Standard, Professional, Enterprise, Ultimate or Trial Editions. The integration with the Free Editions is unavailable.
- Navigate to ZohoCRM -> Settings -> Telephony -> click on "Enable PhoneBridge". If its shown.
- You need to have an activated Zadarma PBX that has been properly set up. Required settings: extension numbers should be created, from 1 to 50 (one for each employee). If needed, call recording (Call recording to Cloud) should be activated under “extension number settings”. Additionally, the incoming calls scenario should be set to the default “without pushing” (in “My PBX” under “Incoming calls and IVR”).
- The extension numbers should either be configured to equipment for receiving and making calls (Softphone/IP-phone) or call forwarding to another number should be enabled.
2. In your Zadarma Personal account, go to “Settings” - “API and integrations”, choose Zoho CRM and select “Enable”
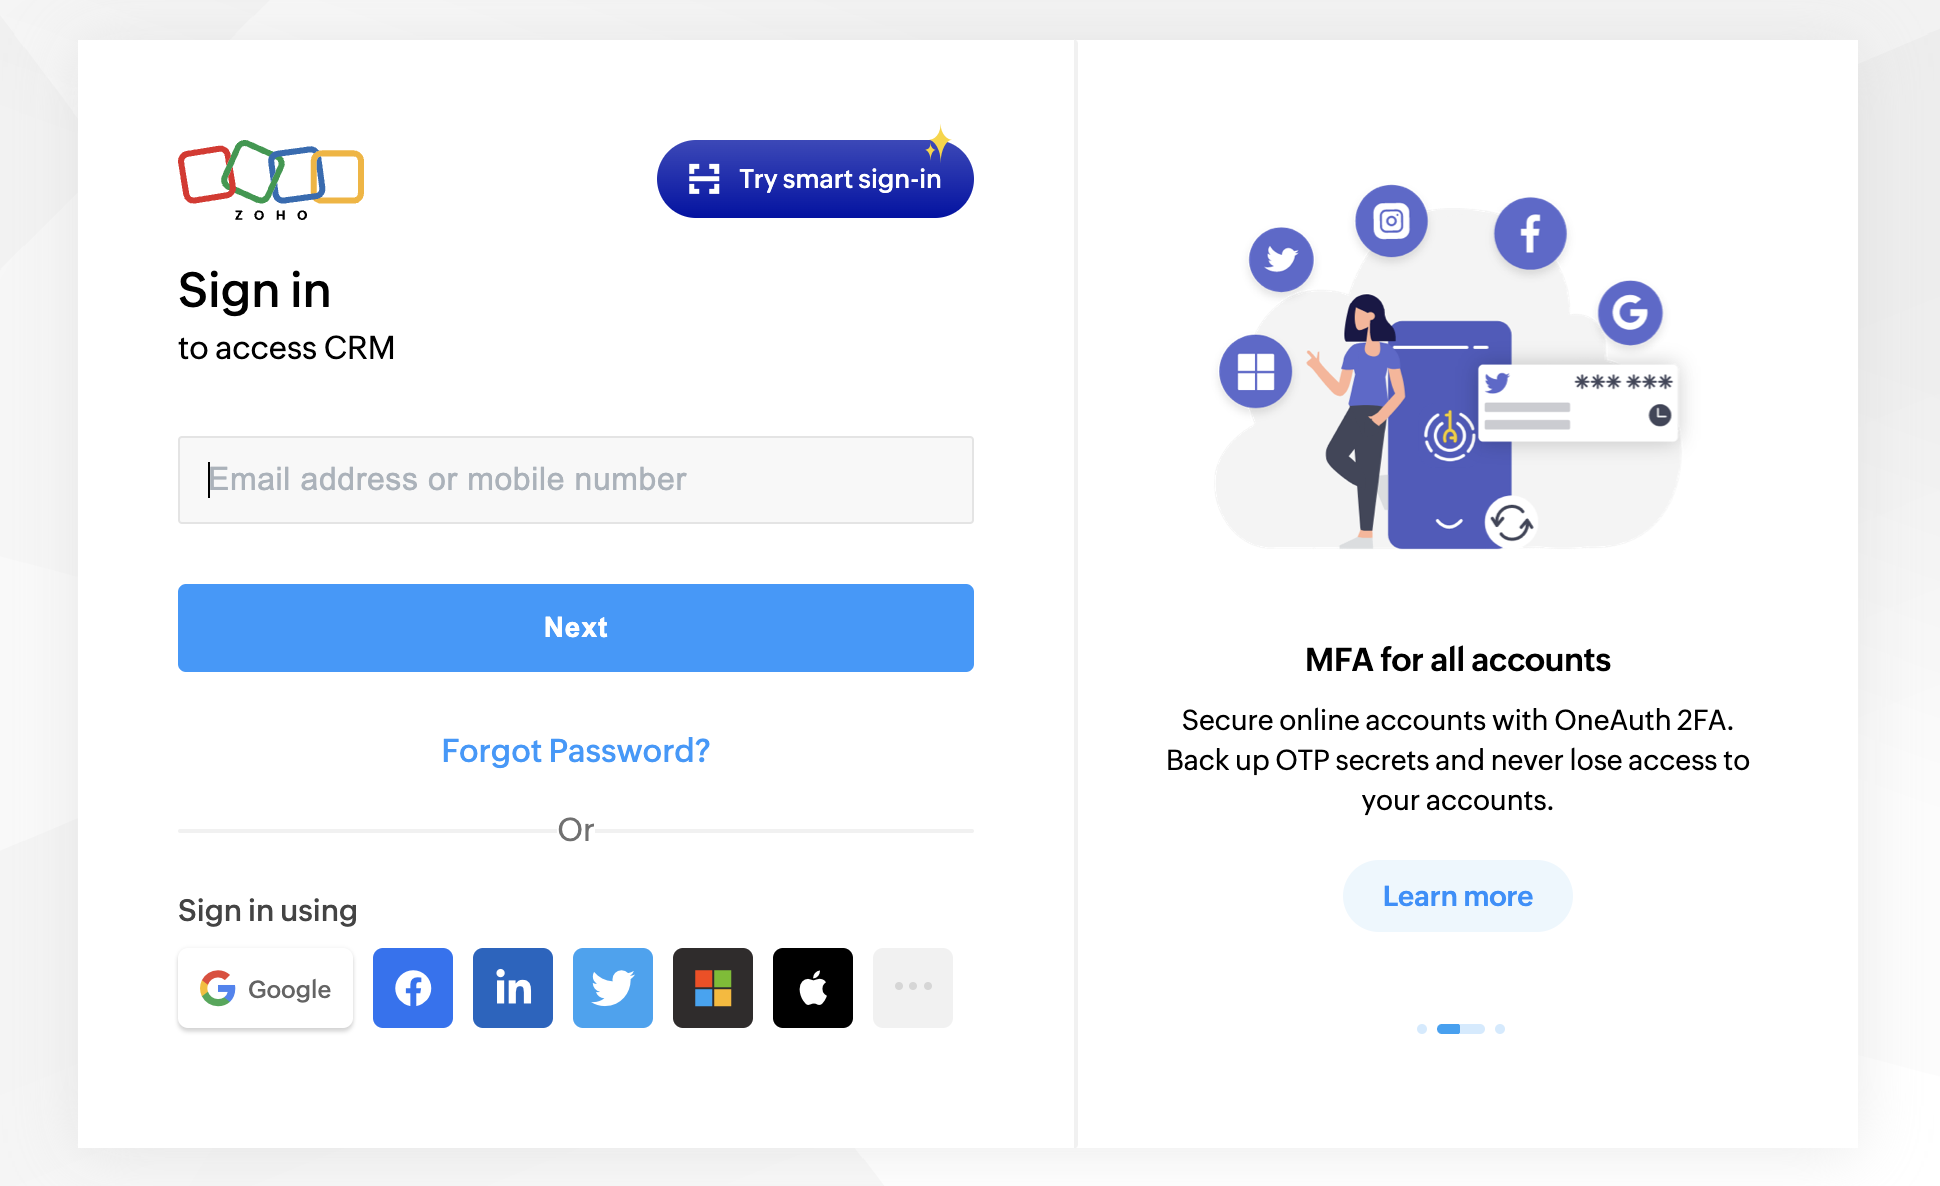
On the next page, log in to your Zoho CRM account.
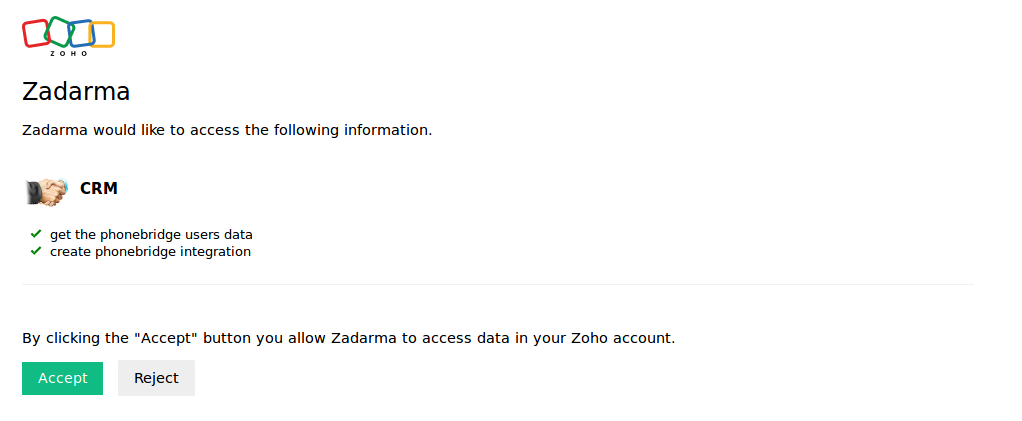
Click “Accept” to accept the user access request to Zoho CRM.
On the integration settings page, allocate the internal PBX numbers to Zoho CRM users and press “Save”.
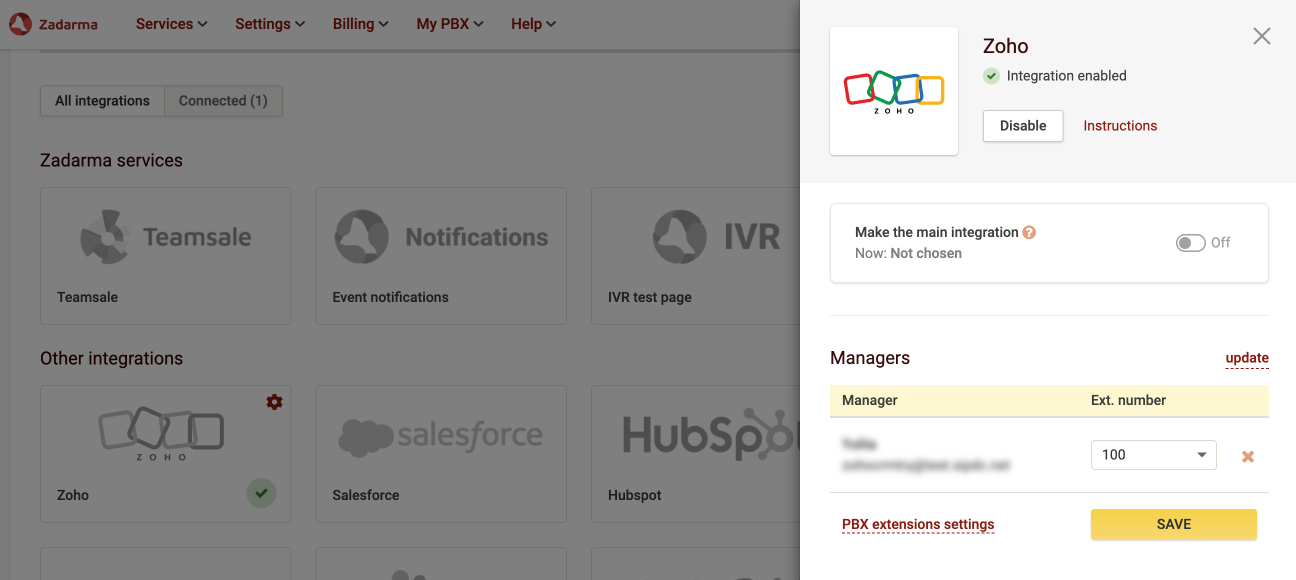
Zadarma virtual PBX integration with Zoho CRM is completed.
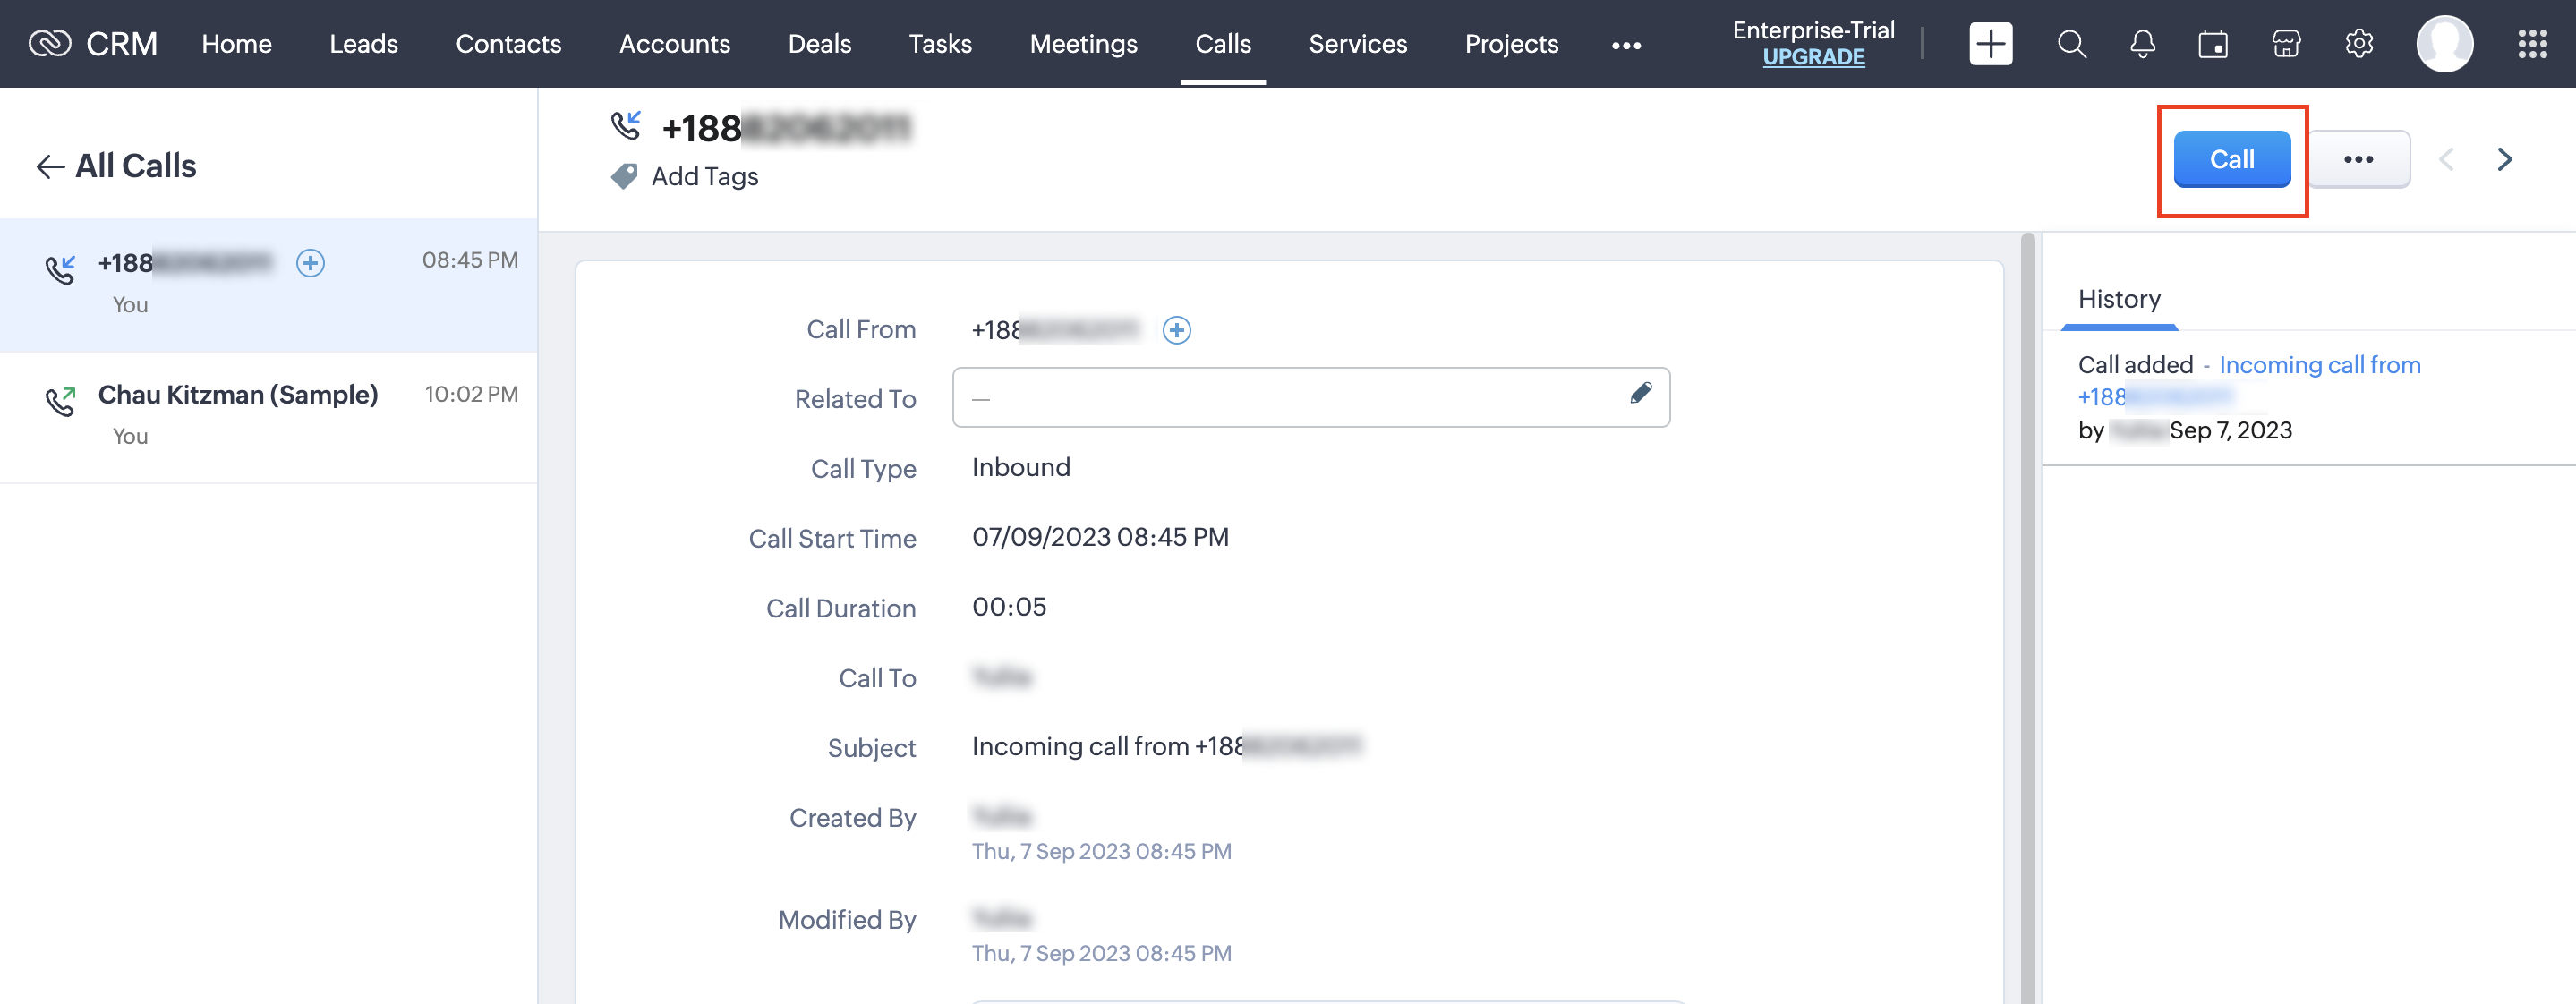
3. To make an outbound call from Zoho CRM just click on the number and the button “Call”.
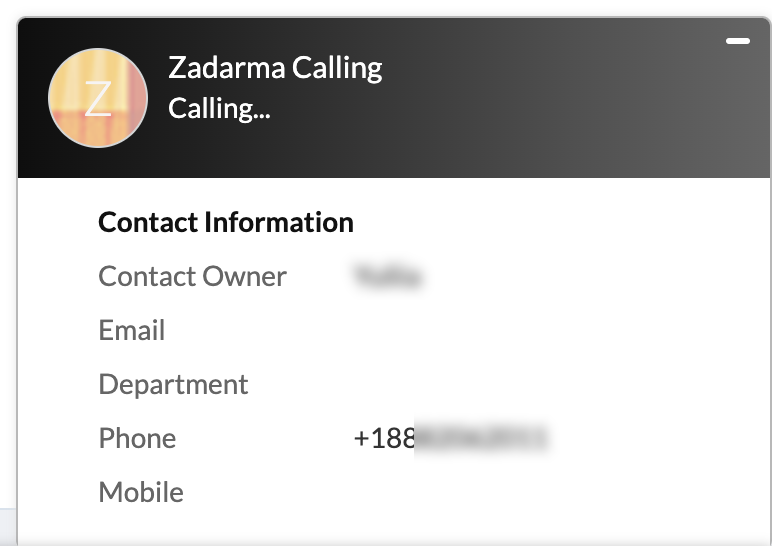
At the time of an incoming or outgoing call, a notification pops up in the right bottom corner of the page. If the phone number has been previously saved in Zoho, the pop-up notification will display the caller’s contact details. If the phone number has not been saved before, you will see a button for creating a new contact.
During the call, the pop-up notification displays the name of the person you are talking to, his or her personal manager, the duration of the call and a comments section.
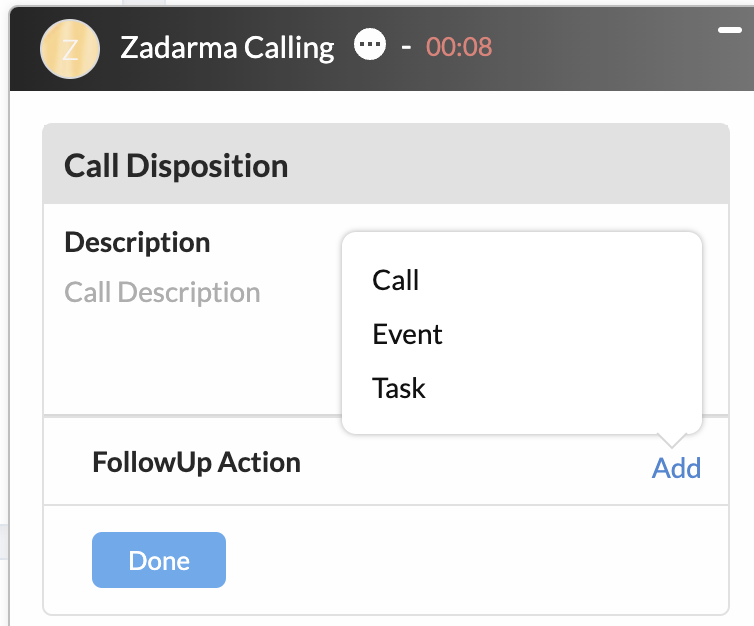
After the call has been completed, a notification displays the total duration of the call and offers several follow-up options: Create a Call, Create an Event or Create a Task.
1. Call. If your client has requested a callback at a later time, in the pop-up notification window, press “Call”, enter a call subject, and call date and time, and then press “Done”. At the set time, Zoho CRM will notify you with an alert that it is time to make the call.
2. Event. You can create an event based on the call, add call participants and choose the alert time.
3. Task. You can create a task based on the call with your client.
Zoho CRM v2 -> v3 migration:
- Disable Zadarma PBX integration on the Settings - Integrations and API page
- Go to ZohoCRM -> Settings -> Telephony -> click “Enable PhoneBridge”, if this option is displayed
- Re-Enable the Zadarma - Zoho PhoneBridge Integration.
If your account type is Zoho One, you need to complete the following steps: Zoho one > Settings -> Telephony channels -> Find and install Zadarma