 Calls
Calls
 Phone numbers
 SMS
SMS
 Business Phone System
 eSIM for Internet
 AI agent
 AI Speech Analytics
 Click to Call
 Call Tracking
 VoIP for Business
 Become a partner
 Integrations
 For whom
 Setup guides
 FAQ
FAQ
 Online chat
 Contact us
 Blog
Blog
1. In your personal Google Analytics account, under «Admin», choose account and property. Under «View» - «Goals» create a goal by clicking on «+New Goal». Choose «Custom» - «Continue».
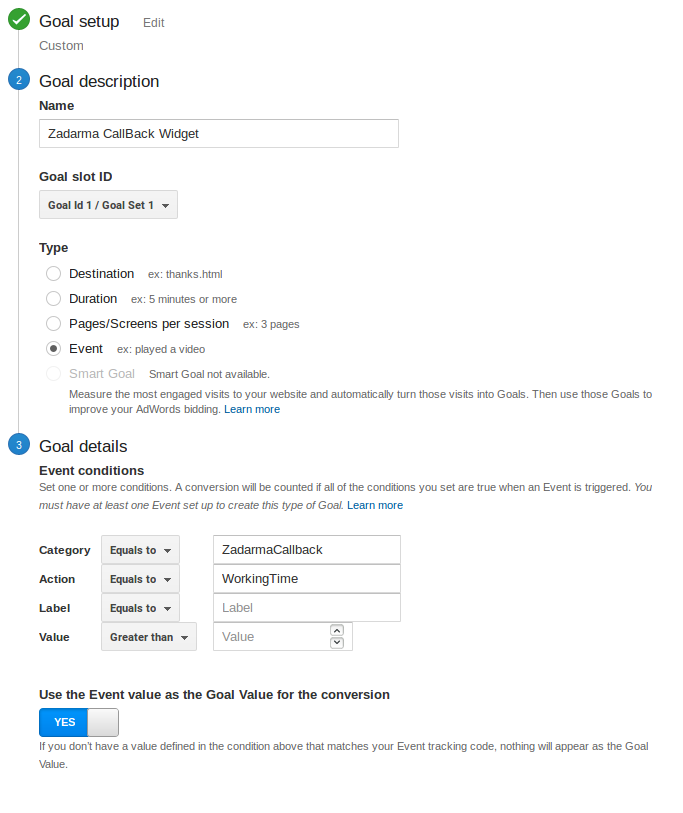
- Name — any value. This will be displayed in your Google Analytics account only.
- Type — Event.
- Category — character line. You need to provide a name for the category to which this goal is related (any value).
- Action — character line. Name the action which is performed (any value).
These 2 parameters are used to create a javascript code, which should be set in the widget settings under «Event for analytics» and «Event for delayed call».
Example:
You can create category and name it ZadarmaCallBack.
A single category can include several events. For example, an event for calls during the working hours can be named «Work» and for delayed calls with name «Delayed».
If Universal Analytics tracking code is set on your website, then the code for the field "Event for analytics" will look like this:
ga('send', 'event', 'ZadarmaCallBack', 'Work');
Code for the field "Event for delayed call":
ga('send', 'event', 'ZadarmaCallBack', 'Delayed');
If Global site tag tracking code is set on your website, then the code for the field "Event for analytics" will look like this:
gtag('event', 'Work', {'event_category': 'ZadarmaCallBack'});
Code for the field "Event for delayed call":
gtag('event', 'Delayed', {'event_category': 'ZadarmaCallBack'});
- Parameters «Label» and «Value» leave without changes and click «Save».
A mandatory condition for analytics to work is to place Universal Analytics as your resource on your website code. You can set this under «Admin» - «Property» - «Traking Code».
You can check goal achievements in «Reports» - «Conversion» - «Goals».
Please note, information is updated once every 24 hours, at midnight.