 Calls
Calls
 Phone numbers
 SMS
SMS
 Business Phone System
 eSIM for Internet
 AI agent
 AI Speech Analytics
 Click to Call
 Call Tracking
 VoIP for Business
 Become a partner
 Integrations
 For whom
 Setup guides
 FAQ
FAQ
 Online chat
 Contact us
 Blog
Blog
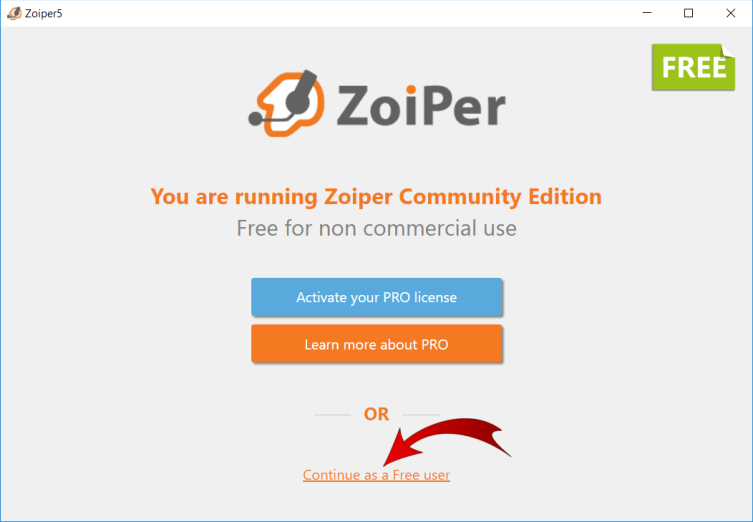
1. Download and install the latest version of the program.
2. When a program starts, a message with suggestion to buy a paid version appears. Click Continue as a Free user (at the bottom of the page).
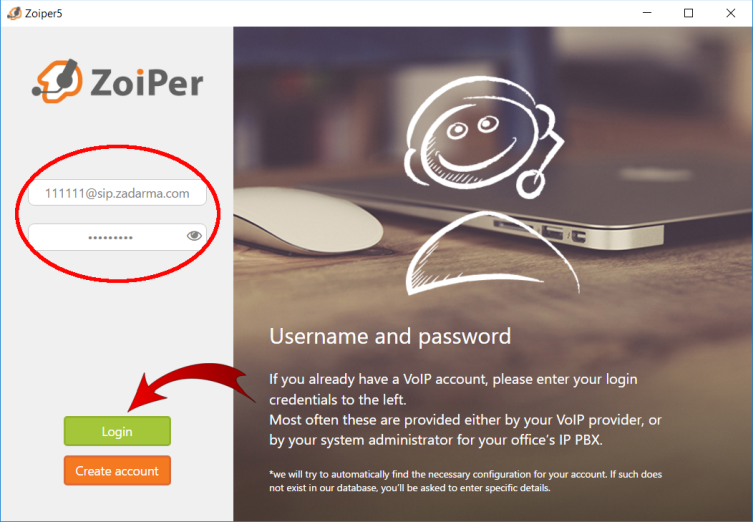
3. Use the server, login and password details from the "Settings”, “SIP Connection" section of your personal profile.
Username: 111111@sip.zadarma.com - where 111111 is your sip number from the personal profile
Password: your sip number password from the "SIP Connection" section of your personal profile.
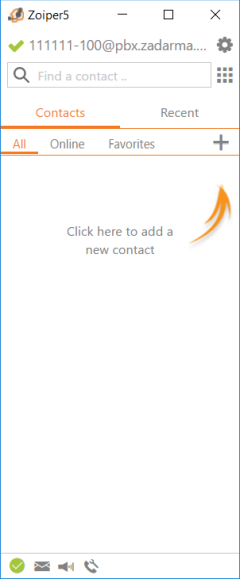
After you’ve entered the details, click the “Login” button.
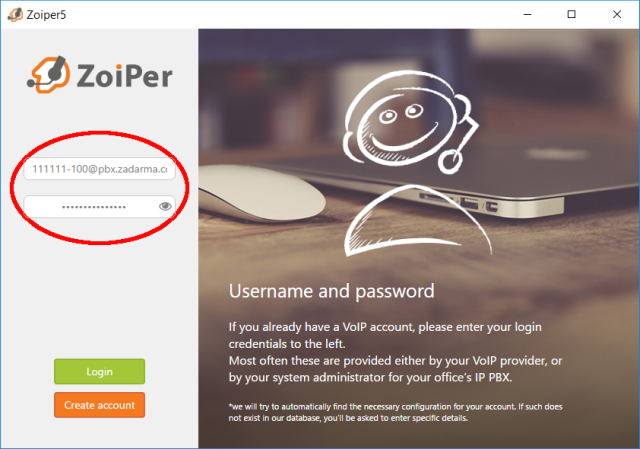
3. Use the server, login and password details from the "MyPBX”, “Extension numbers" section of your personal profile.
Username: 1234-100@pbx.zadarma.com - where 1234-100 is your PBX extension number from your personal profile
Password: your PBX extension number password from your personal profile
After you’ve entered the details, click the “Login” button.
4. On the next page, enter the sip.zadarma.com server address and click Next.
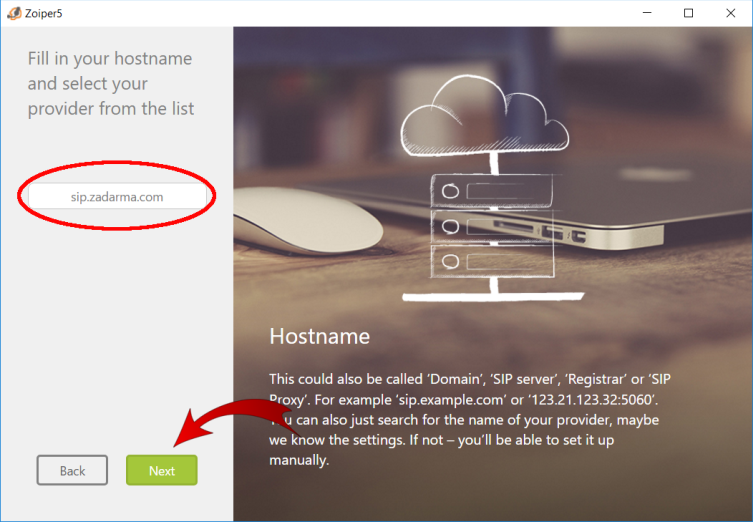
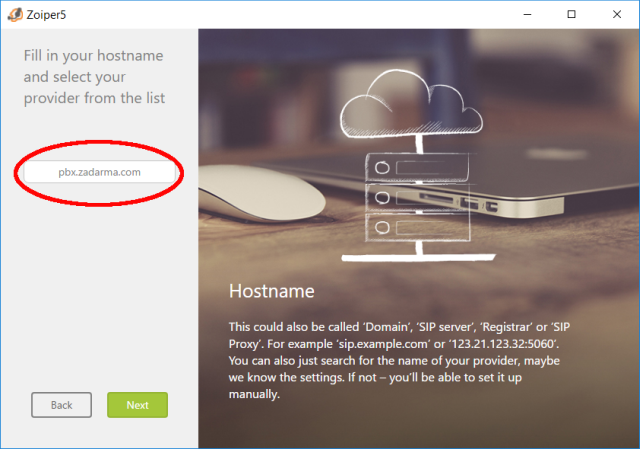
4. On the next page, enter the pbx.zadarma.com server address and click “Next”.
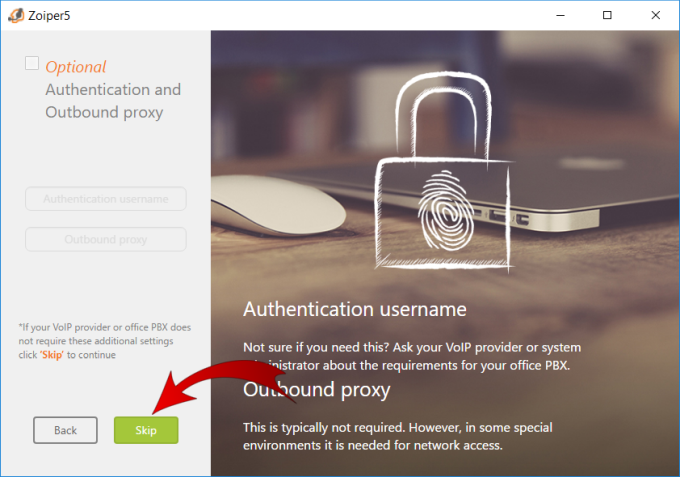
5. Click the “Skip” button
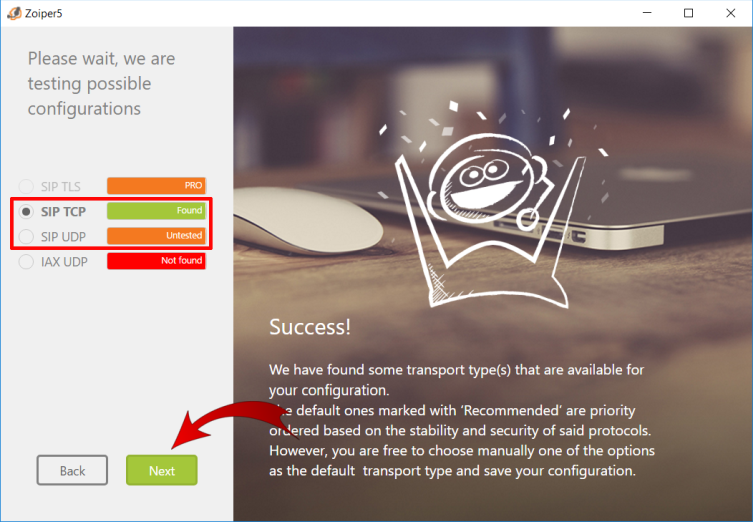
6. At the next stage, Zoiper will try to find a priority transport for your network. Select SIP UDP or select SIP TCP if the first one has the Untested status. Then click "Next".
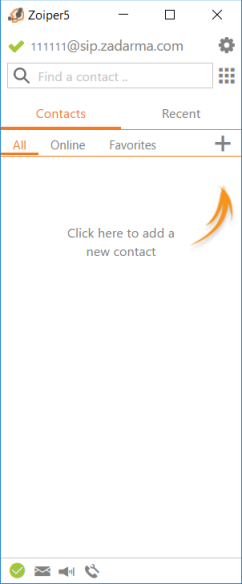
You can test the audio devices on the next page. The setup is now complete.
Enabling encryption
1. Go to Settings - Accounts - Your Account
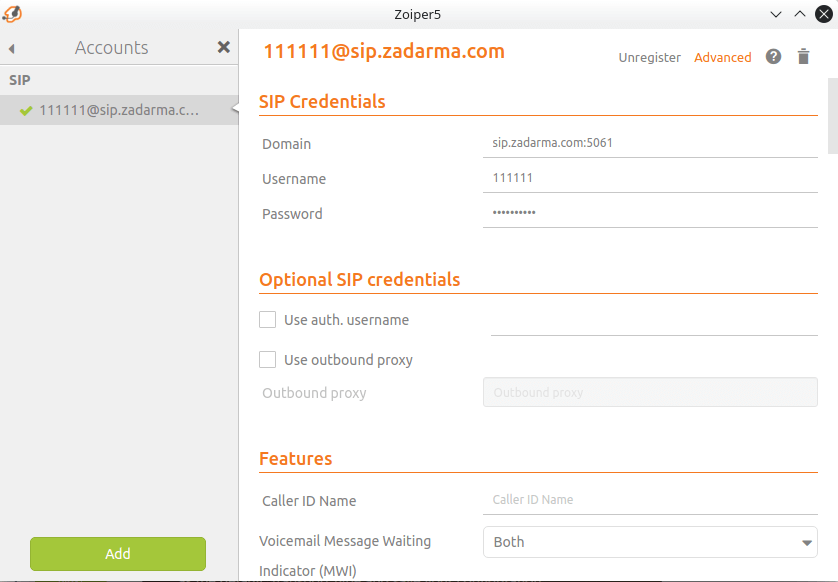
2. In the Domain field after the server enter :5061
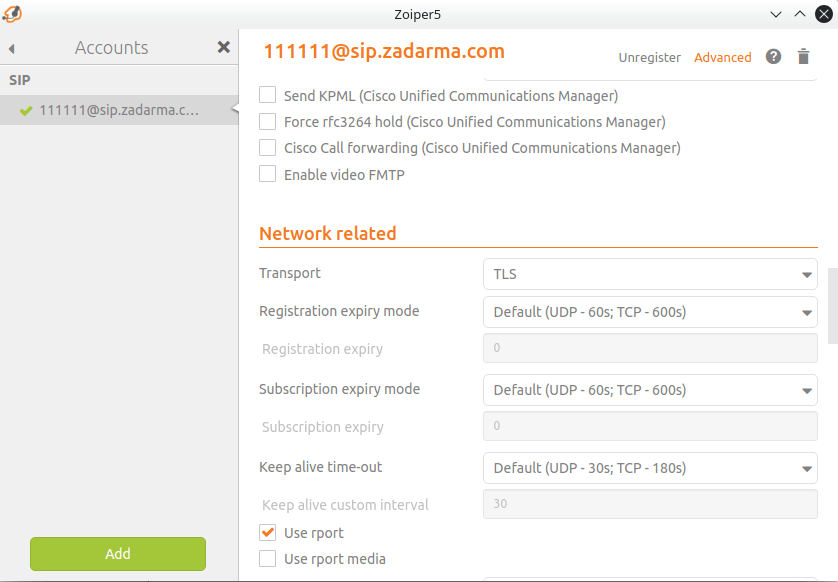
3. Then go to Extended Settings in the Network Related tab in the Transport field choose TLS
4. In the encryption tab in SRTP Key negotiation choose SDES
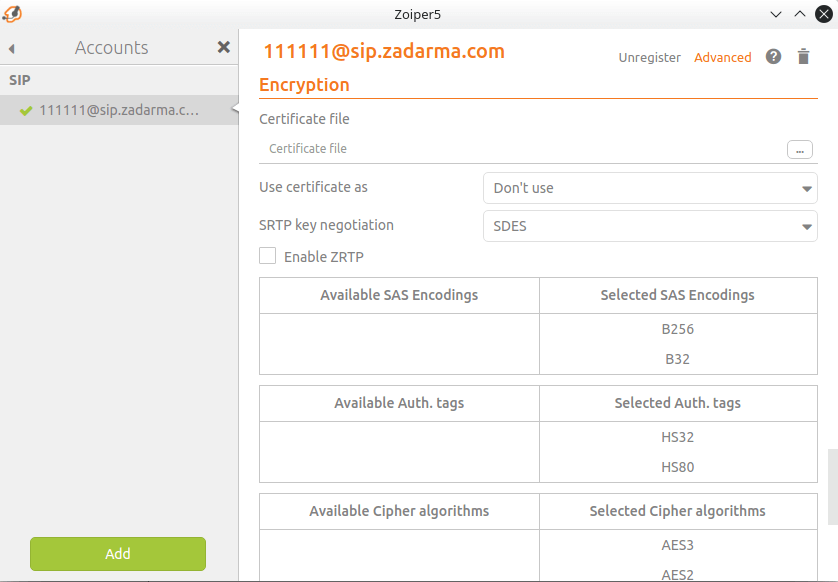
Confirm settings